Pro-Touring Bronco (aka the build that started Bolide Plastic Motorworks)

Pro-Touring Style Revell 1/25 Scale Bronco kit. My wildest build yet!
A new twist on revell’s fantastic 1st generation bronco kit.
I first got back into building models in early 2019 after many years away from the hobby. What had once been a fun childhood activity became a serious hobby and a way to fill my time after getting sober. My first build returning to the hobby as an adult was a relatively box-stock version of Revell’s 1/25 scale Bronco. I quickly fell back in love with modelling and also with the Revell Bronco. I had scarcely finished that first kit when the gears for another Bronco build began turning in my head. Inspired by an awesome lowered 1st generation International Scout street rod I had seen in Denver a few years earlier and pictures of The Olson Brothers’ fantastic cast resin Bronco Half Cab kit, an idea for a lowered, Pro-Touring style Bronco took shape.
So in October of 2019, I began work on the “Buckin’ Bronc.” I quickly realized that such a badass lowered Bronco model should have something a little more exciting under the hood than the reliable, but tame 302 that comes in the kit. I looked in my stash and found the AMT 1967 Mustang GT Fuel Injected Funny Car model complete with its powerful (and big!) 427 fuel-injected SOHC engine, the engine so advanced and powerful it was immediately banned from NASCAR in 1964. This engine was putting out nearly 650 HP from the factory! I knew then that I had found the motor for this build.

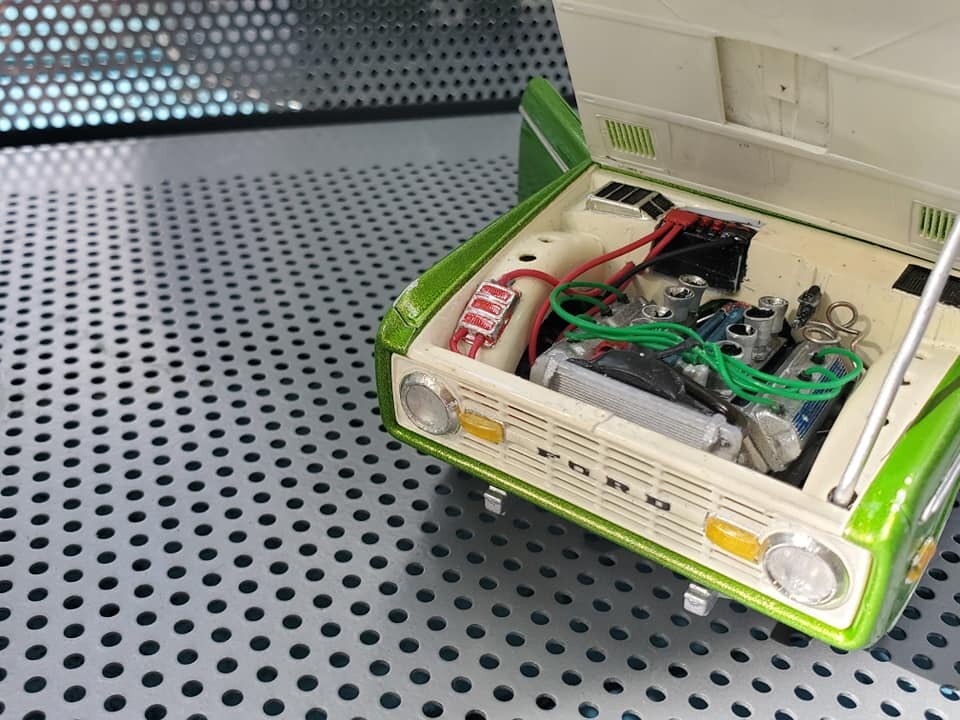
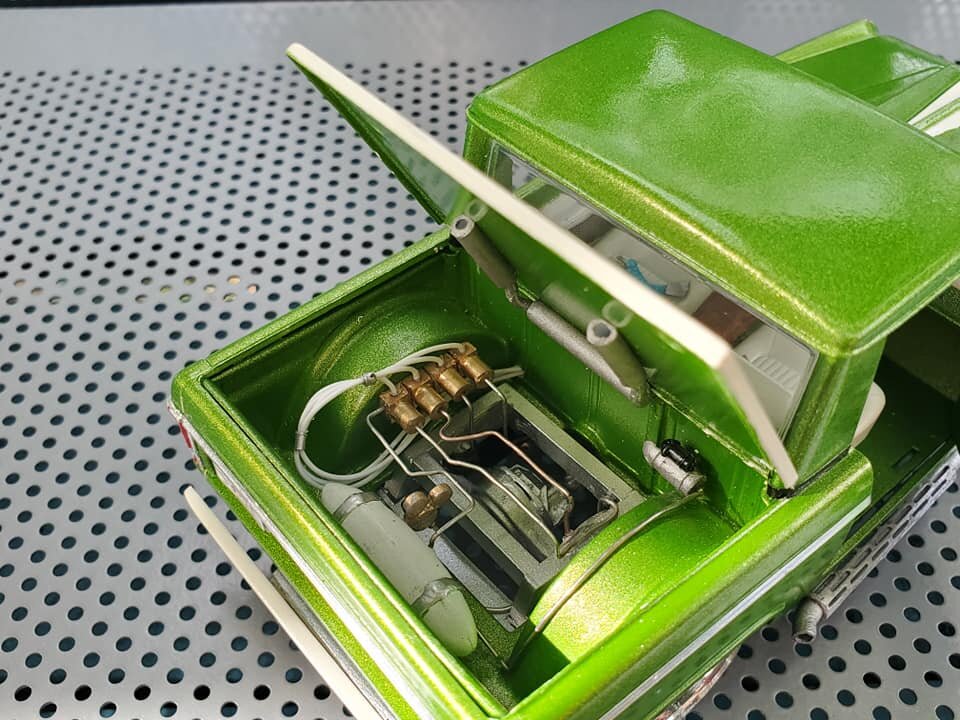
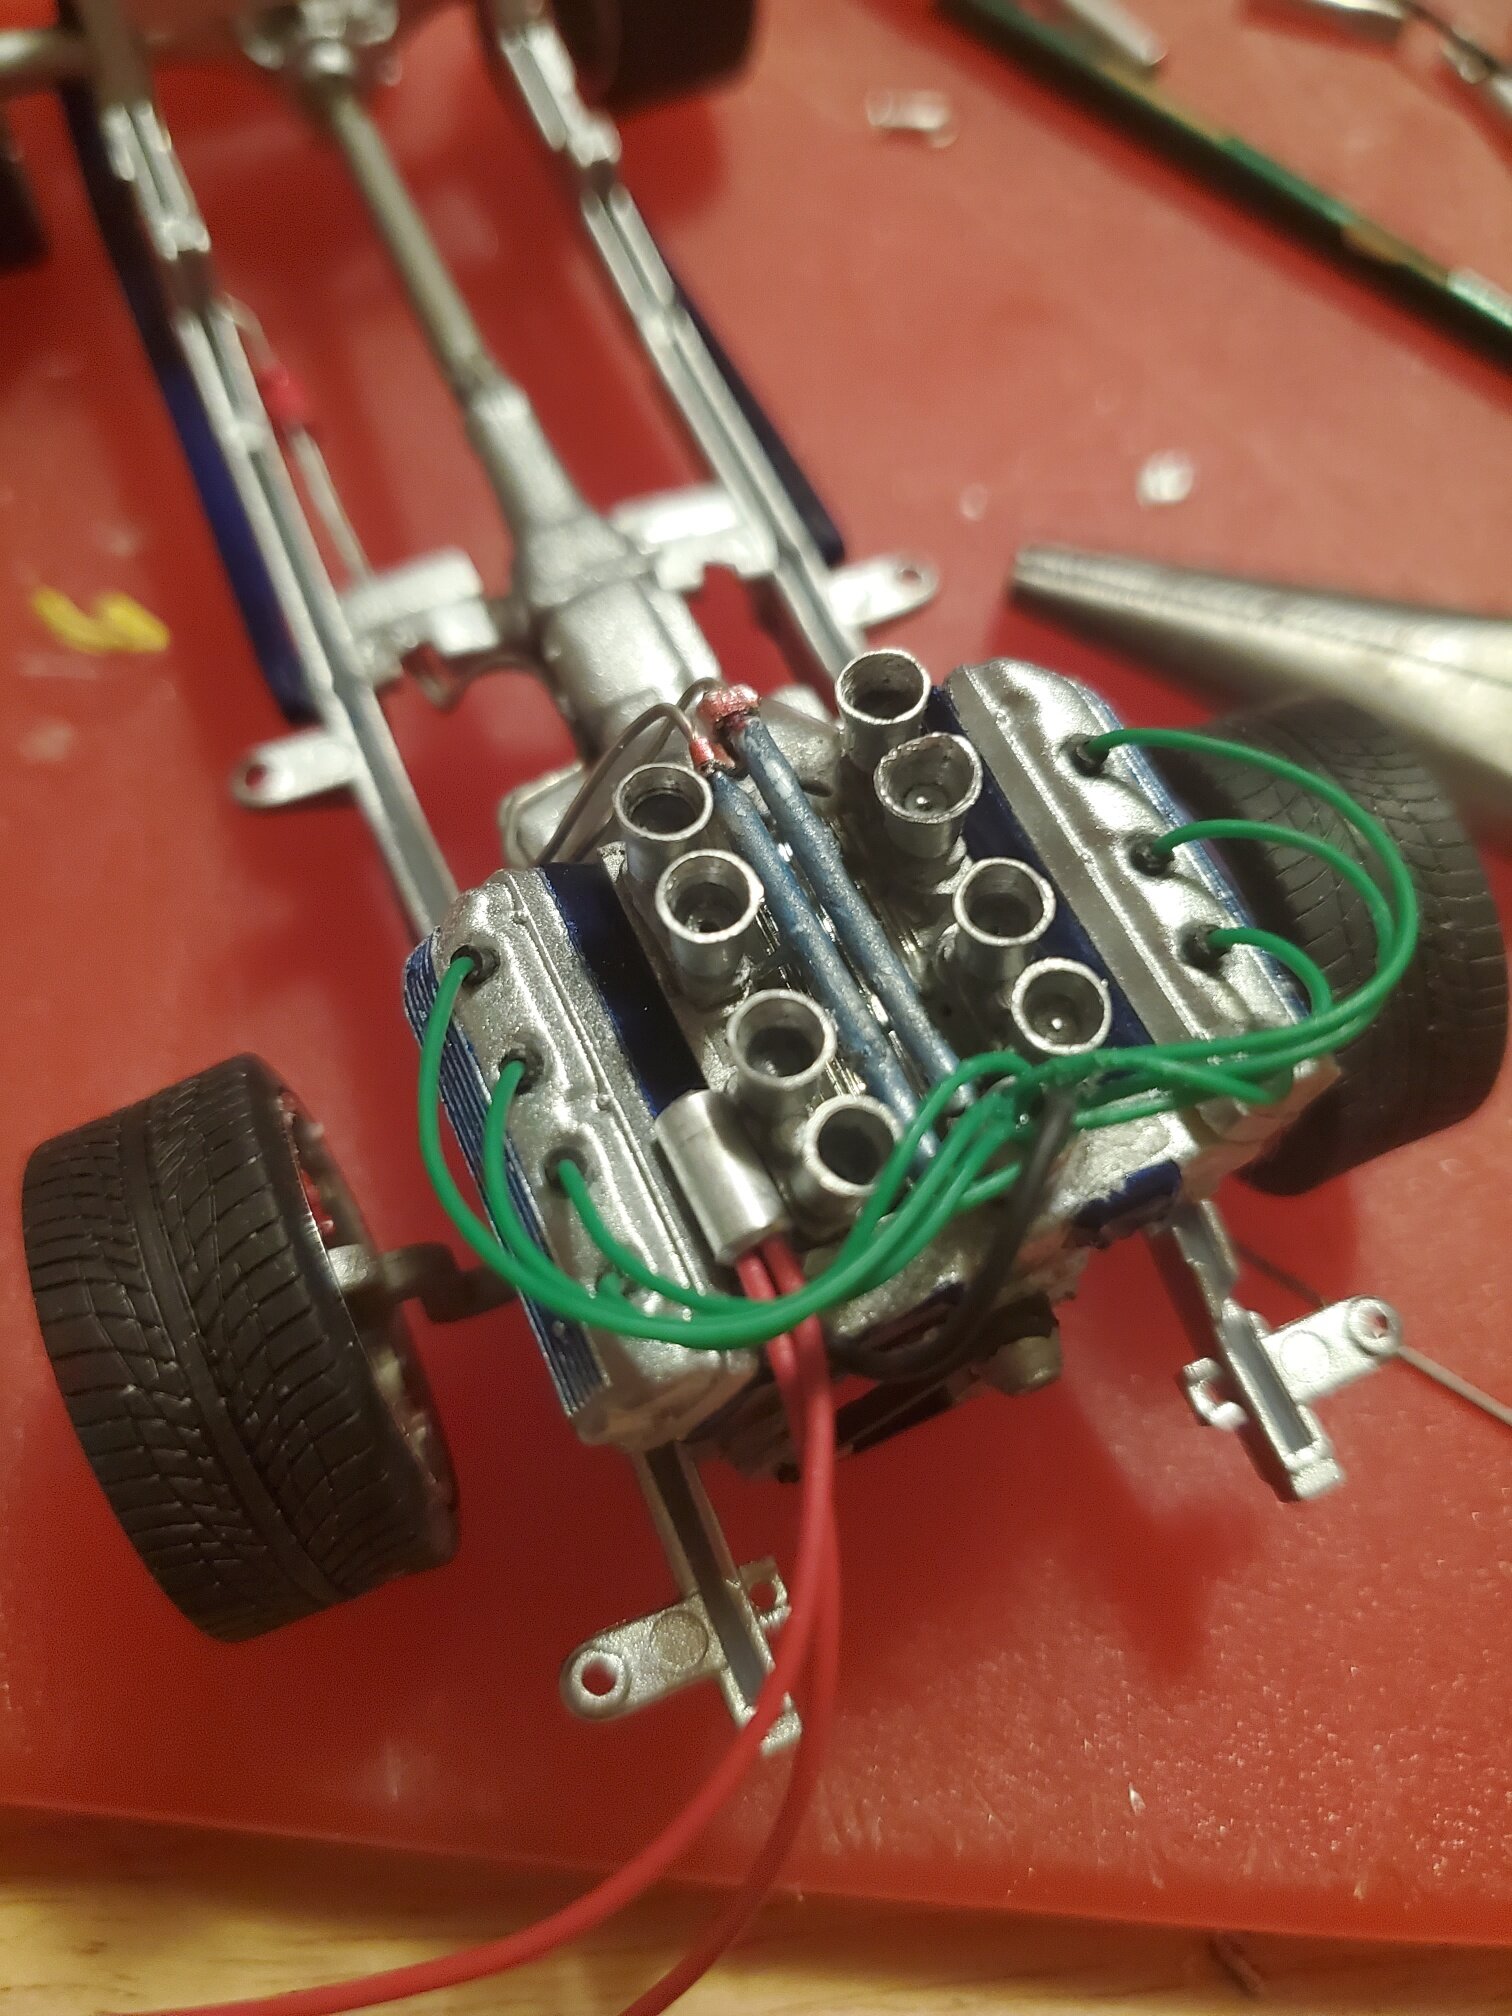
View of the engine compartment and big stinkin’ 427 SOHC motor stolen from an AMT kit. Note the custom inner fenders required to allow this engine to fit. If you look closely between the handmade velocity stacks, you can see the blue scratch-built fuel rails.
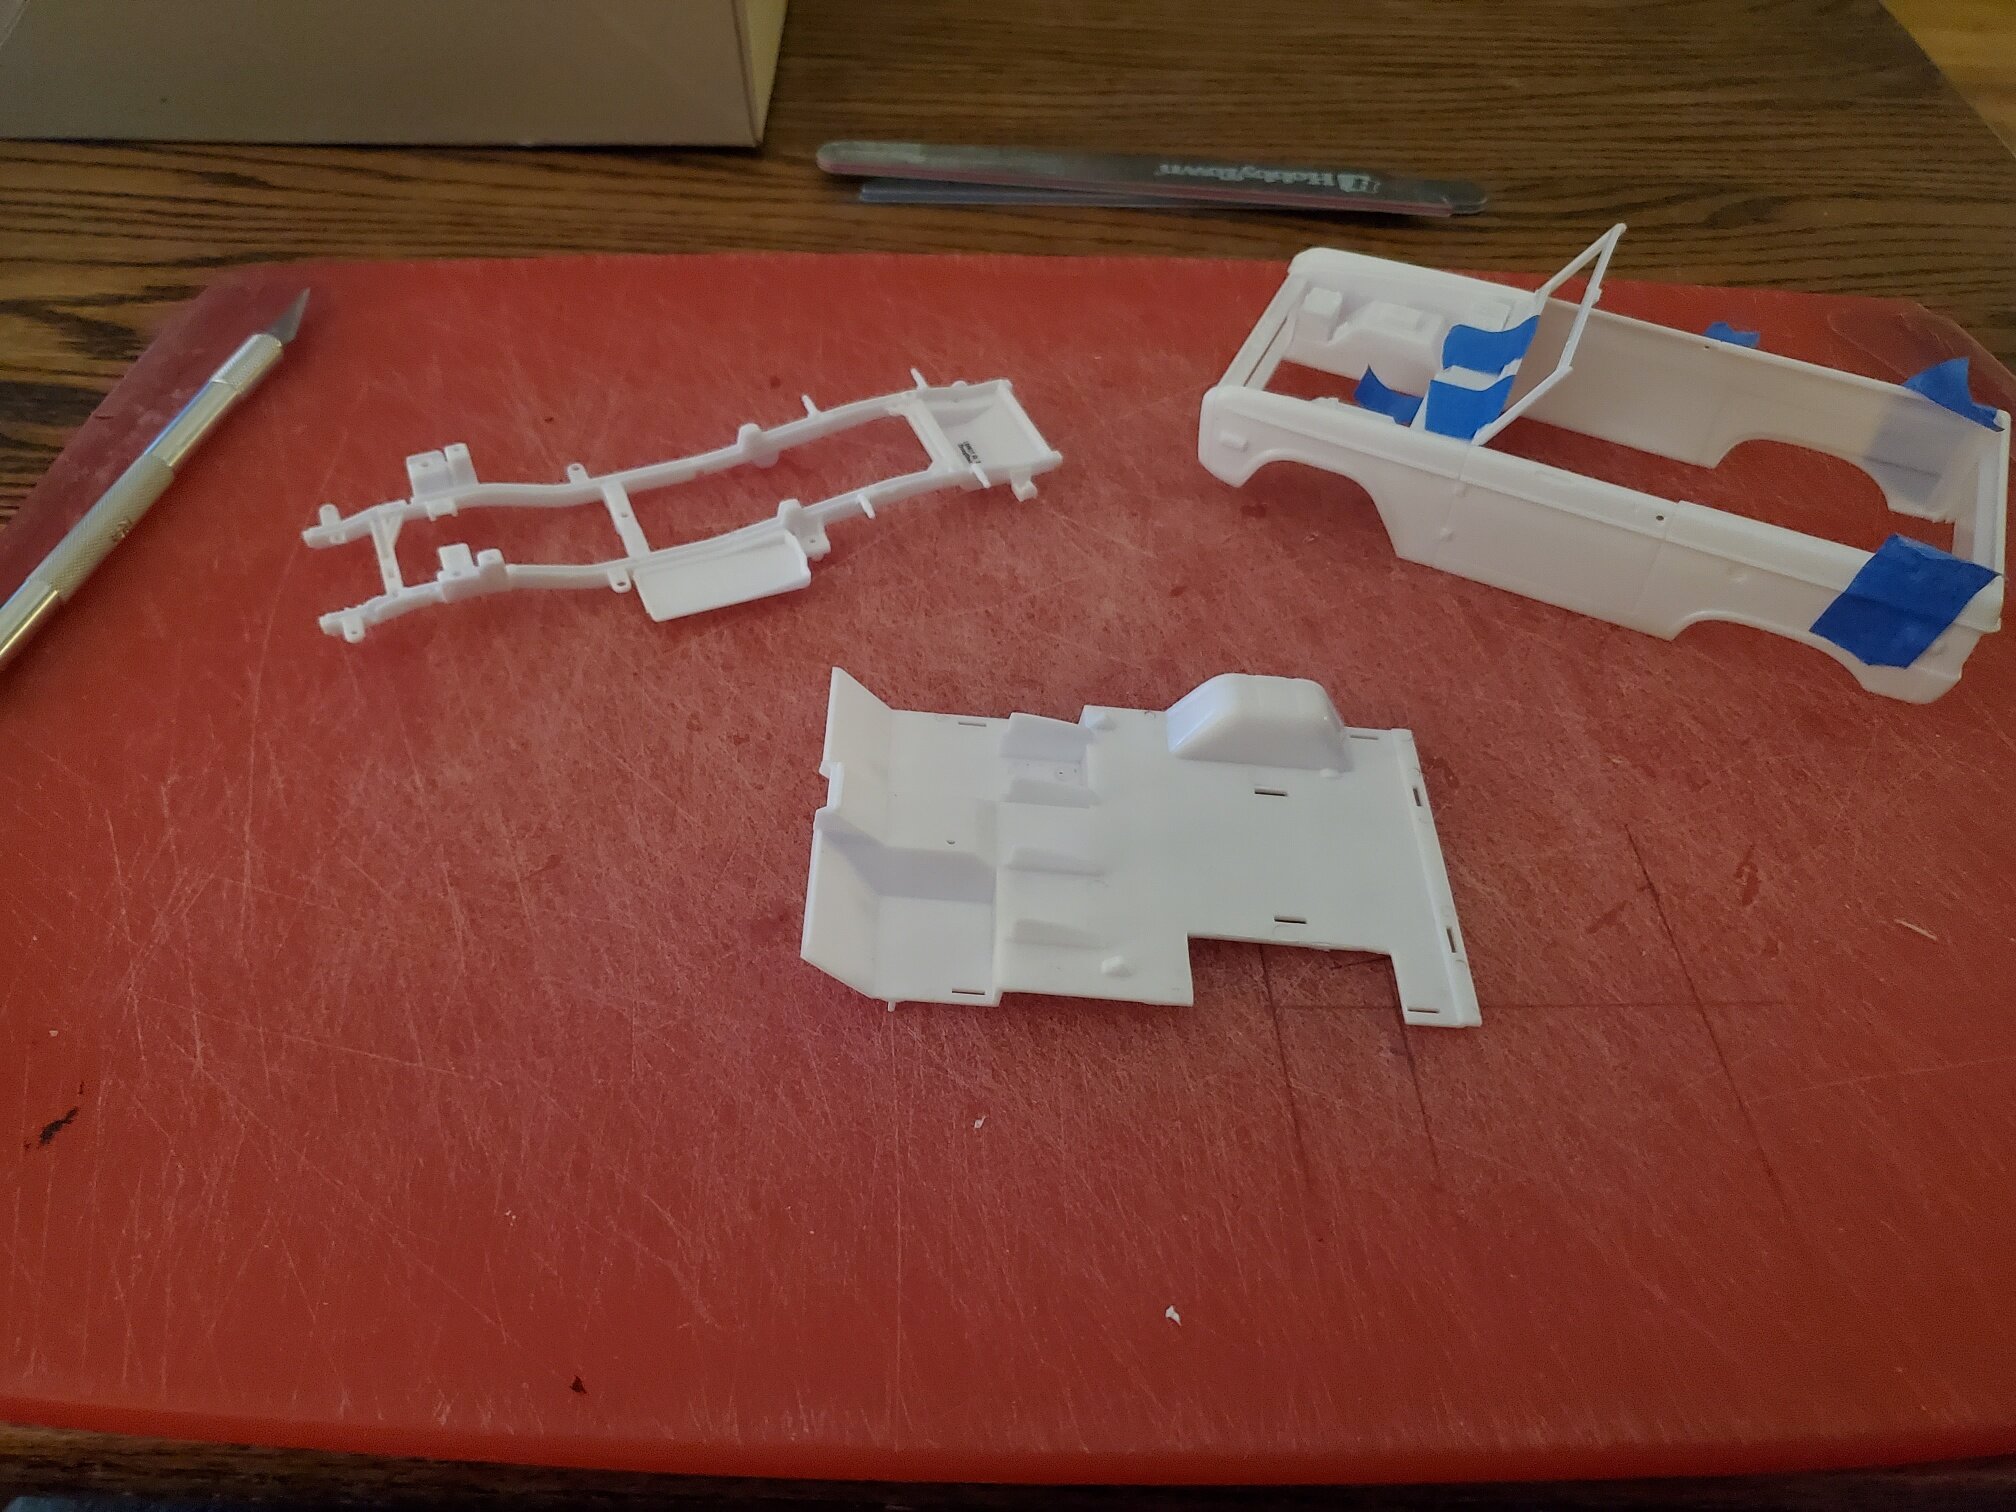
Chop time
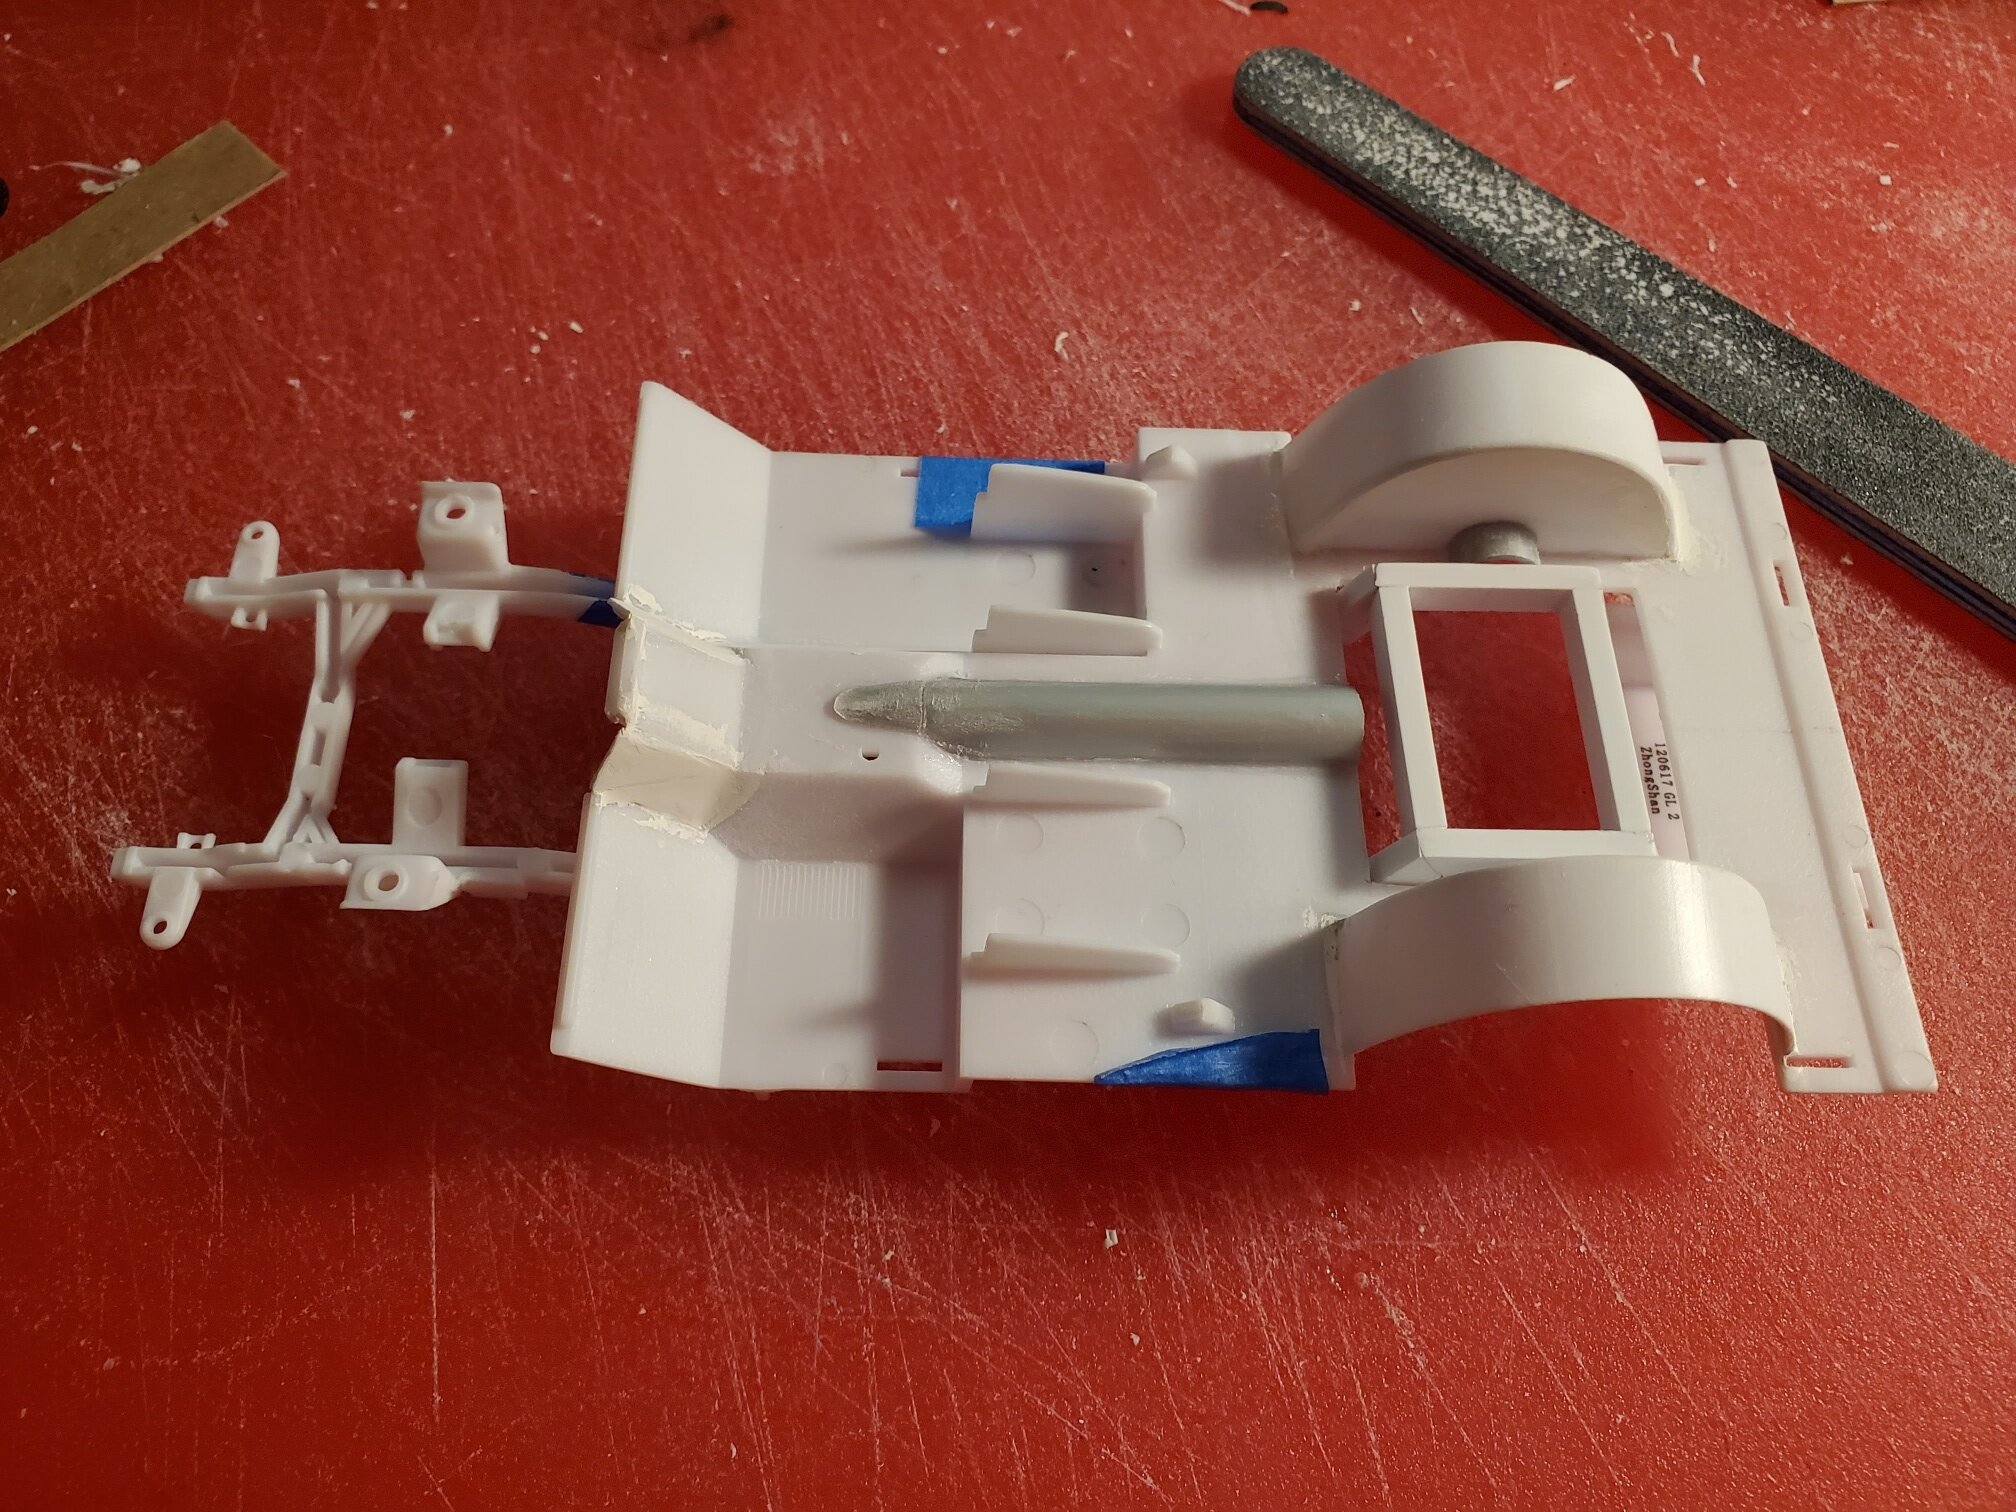
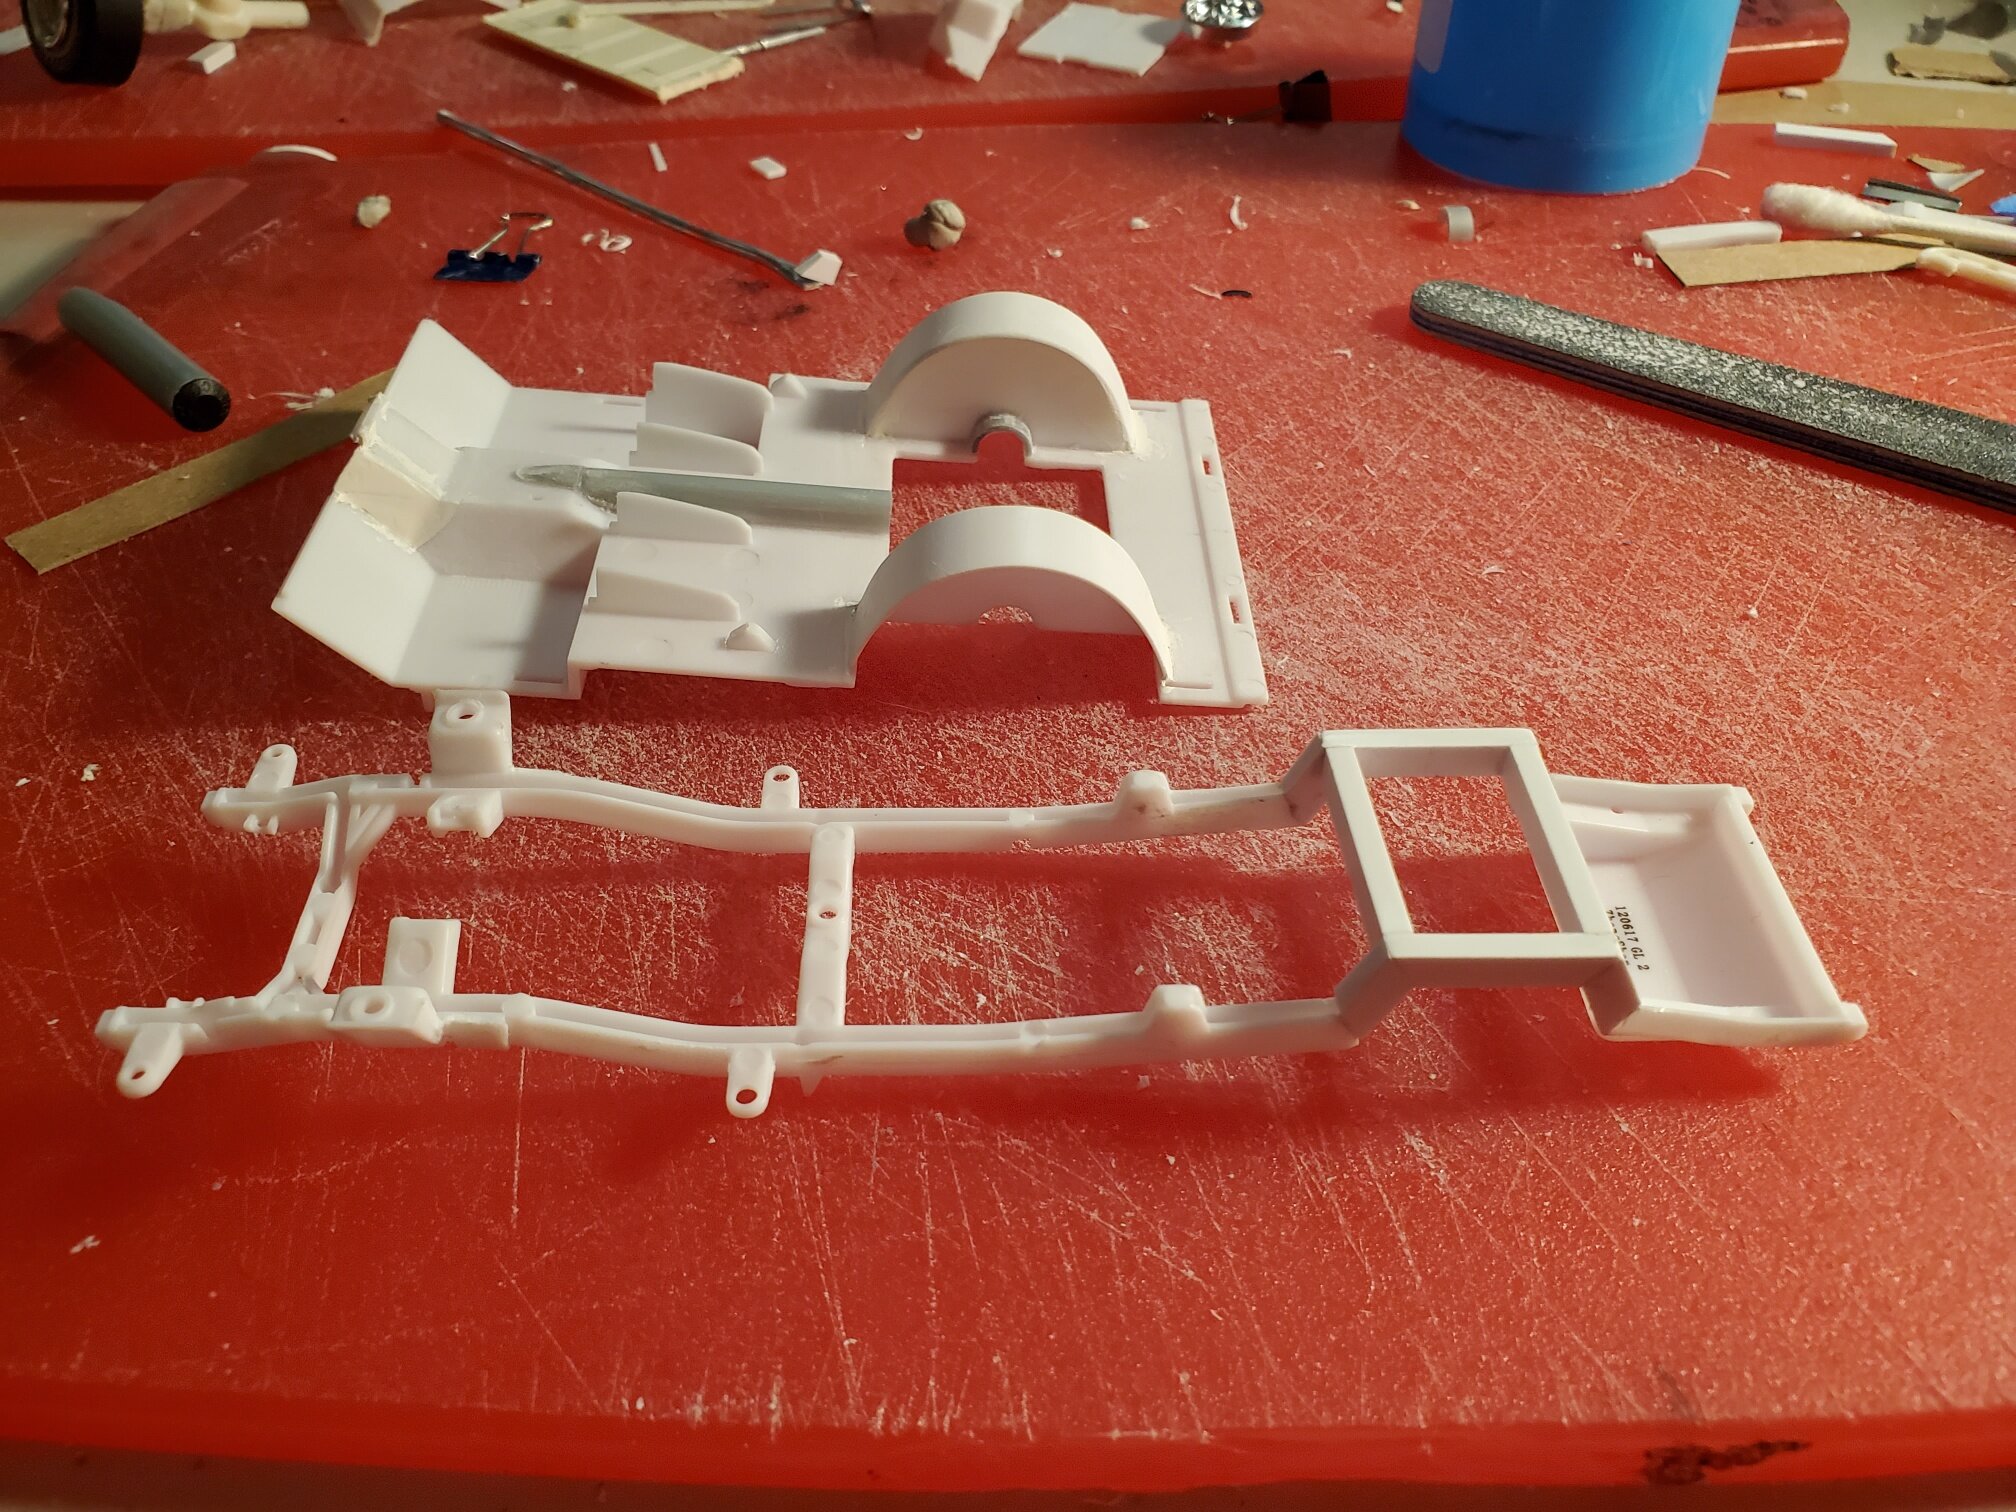
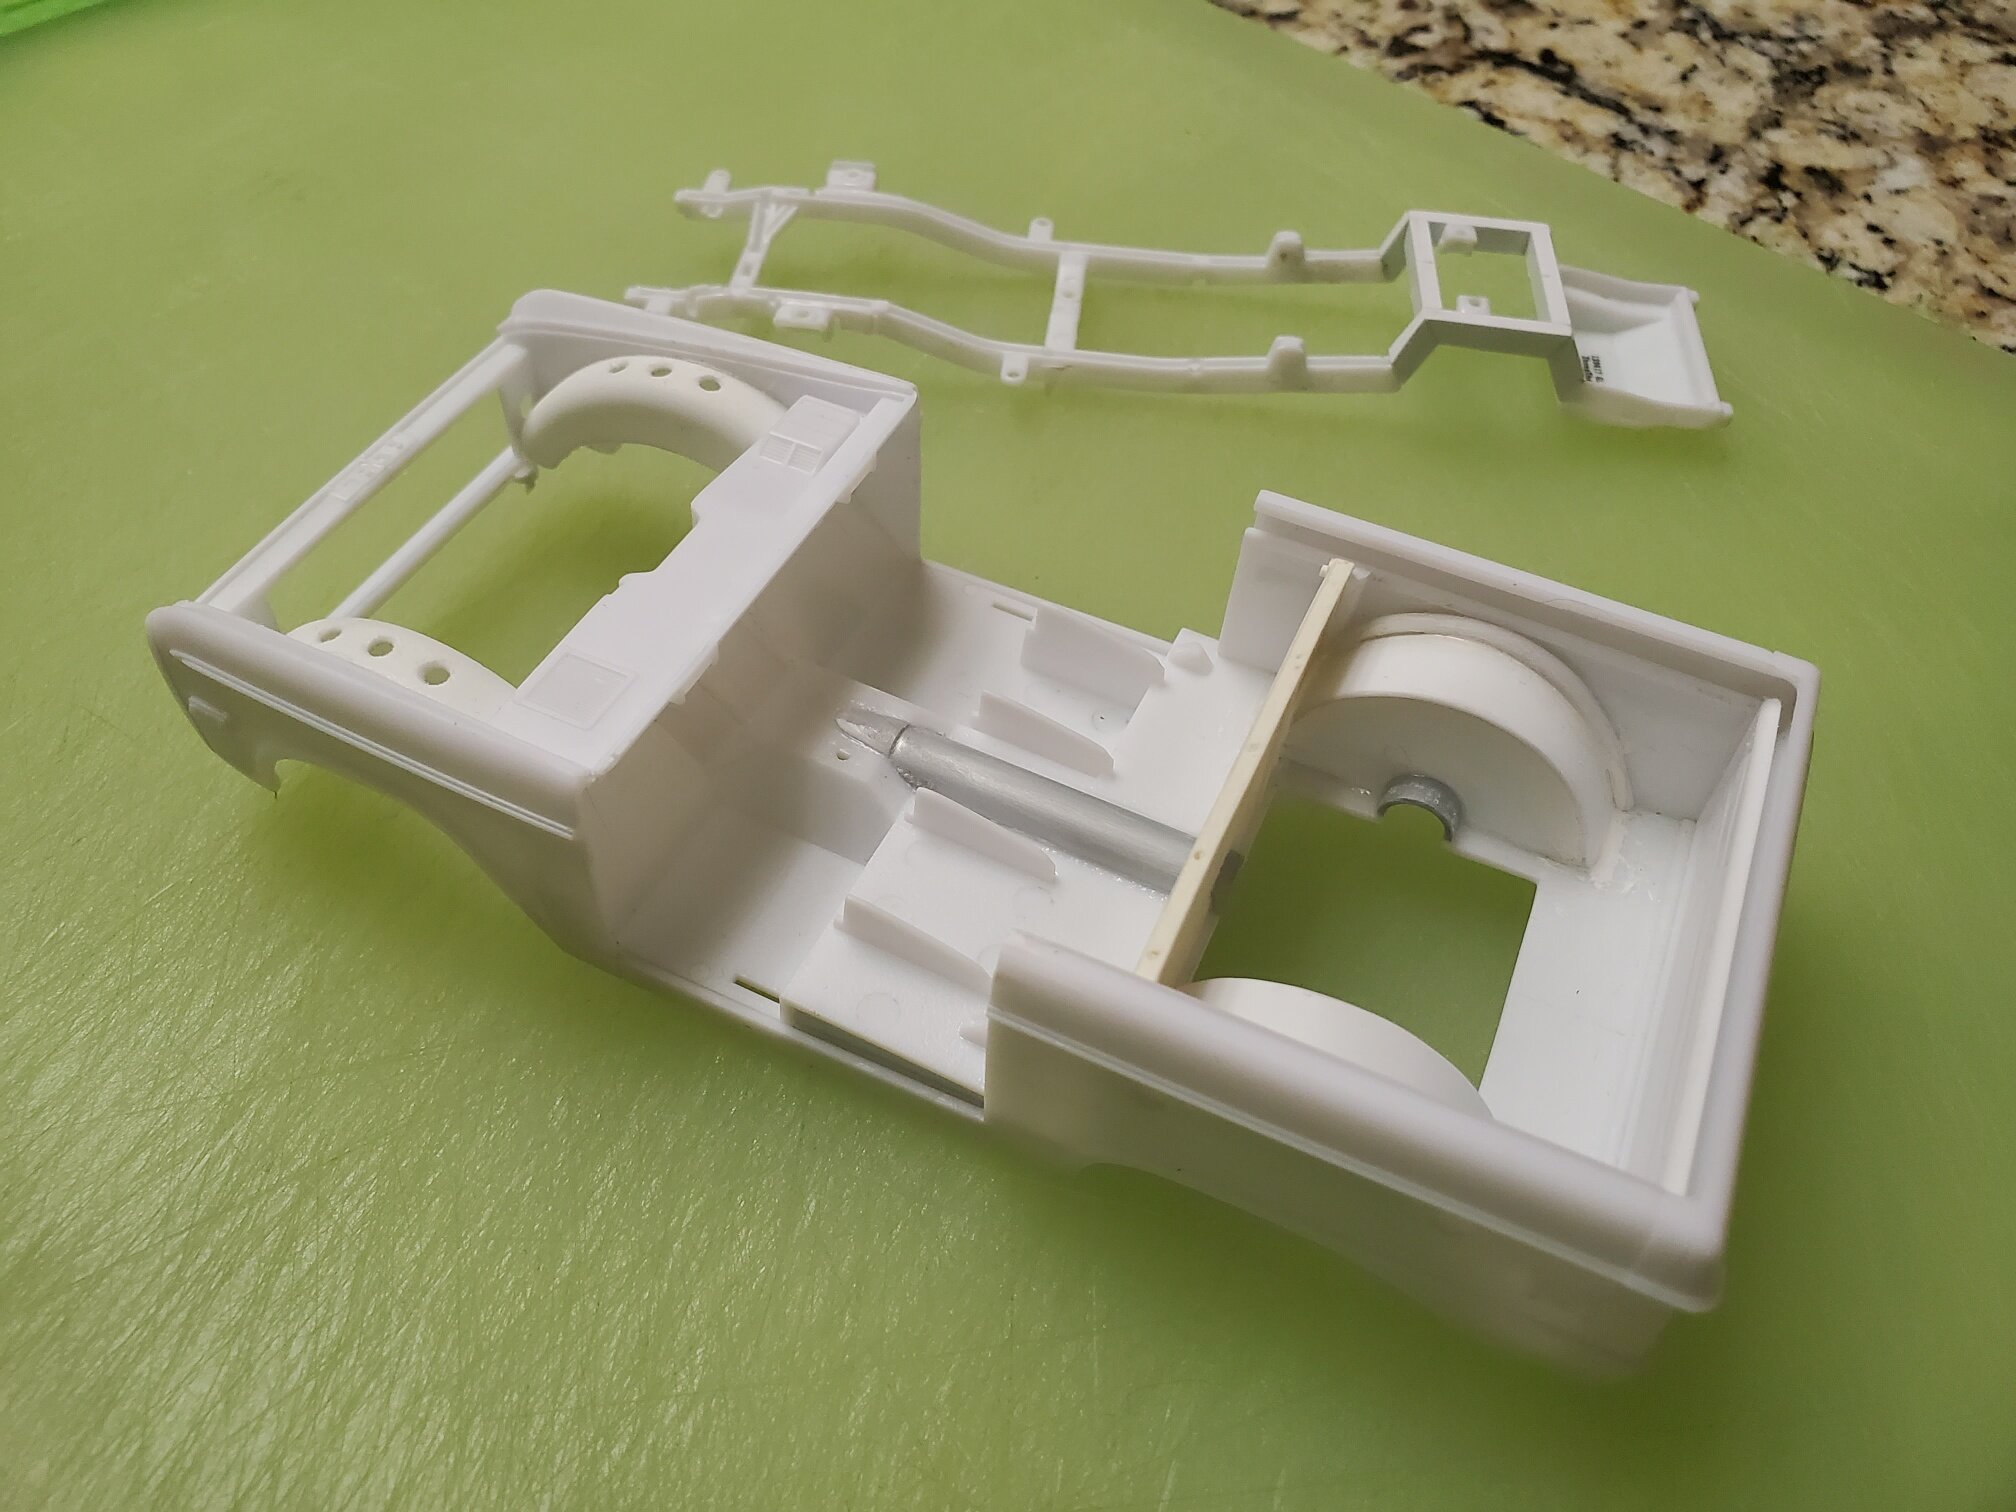
With an engine picked out and a few sketches made, I started building this lowered Bronco. And by building, I mean cutting. Lots of cutting. I knew right away that to get this truck down as low as I wanted to go, I was going to need to notch the rear frame. That meant opening up the rear of the floor pan to accommodate the notch, as well as cutting out the stock wheel wells front and rear and replacing them with scratch-built tubs. Cutting out the front inner fenders was also necessary to fit the massive motor. I cut the rear of the frame and scratch-built a frame notch (this was still before I got into 3D printing). In the process of cutting and test-fitting, I also determined I would need to channel the body pan for the driveshaft and modify the front of the transmission tunnel. Also in test-fitting, I discovered that the stock oil pan would sit far too low and interfere with a lowered front suspension. This was where I first ventured into 3D printing.

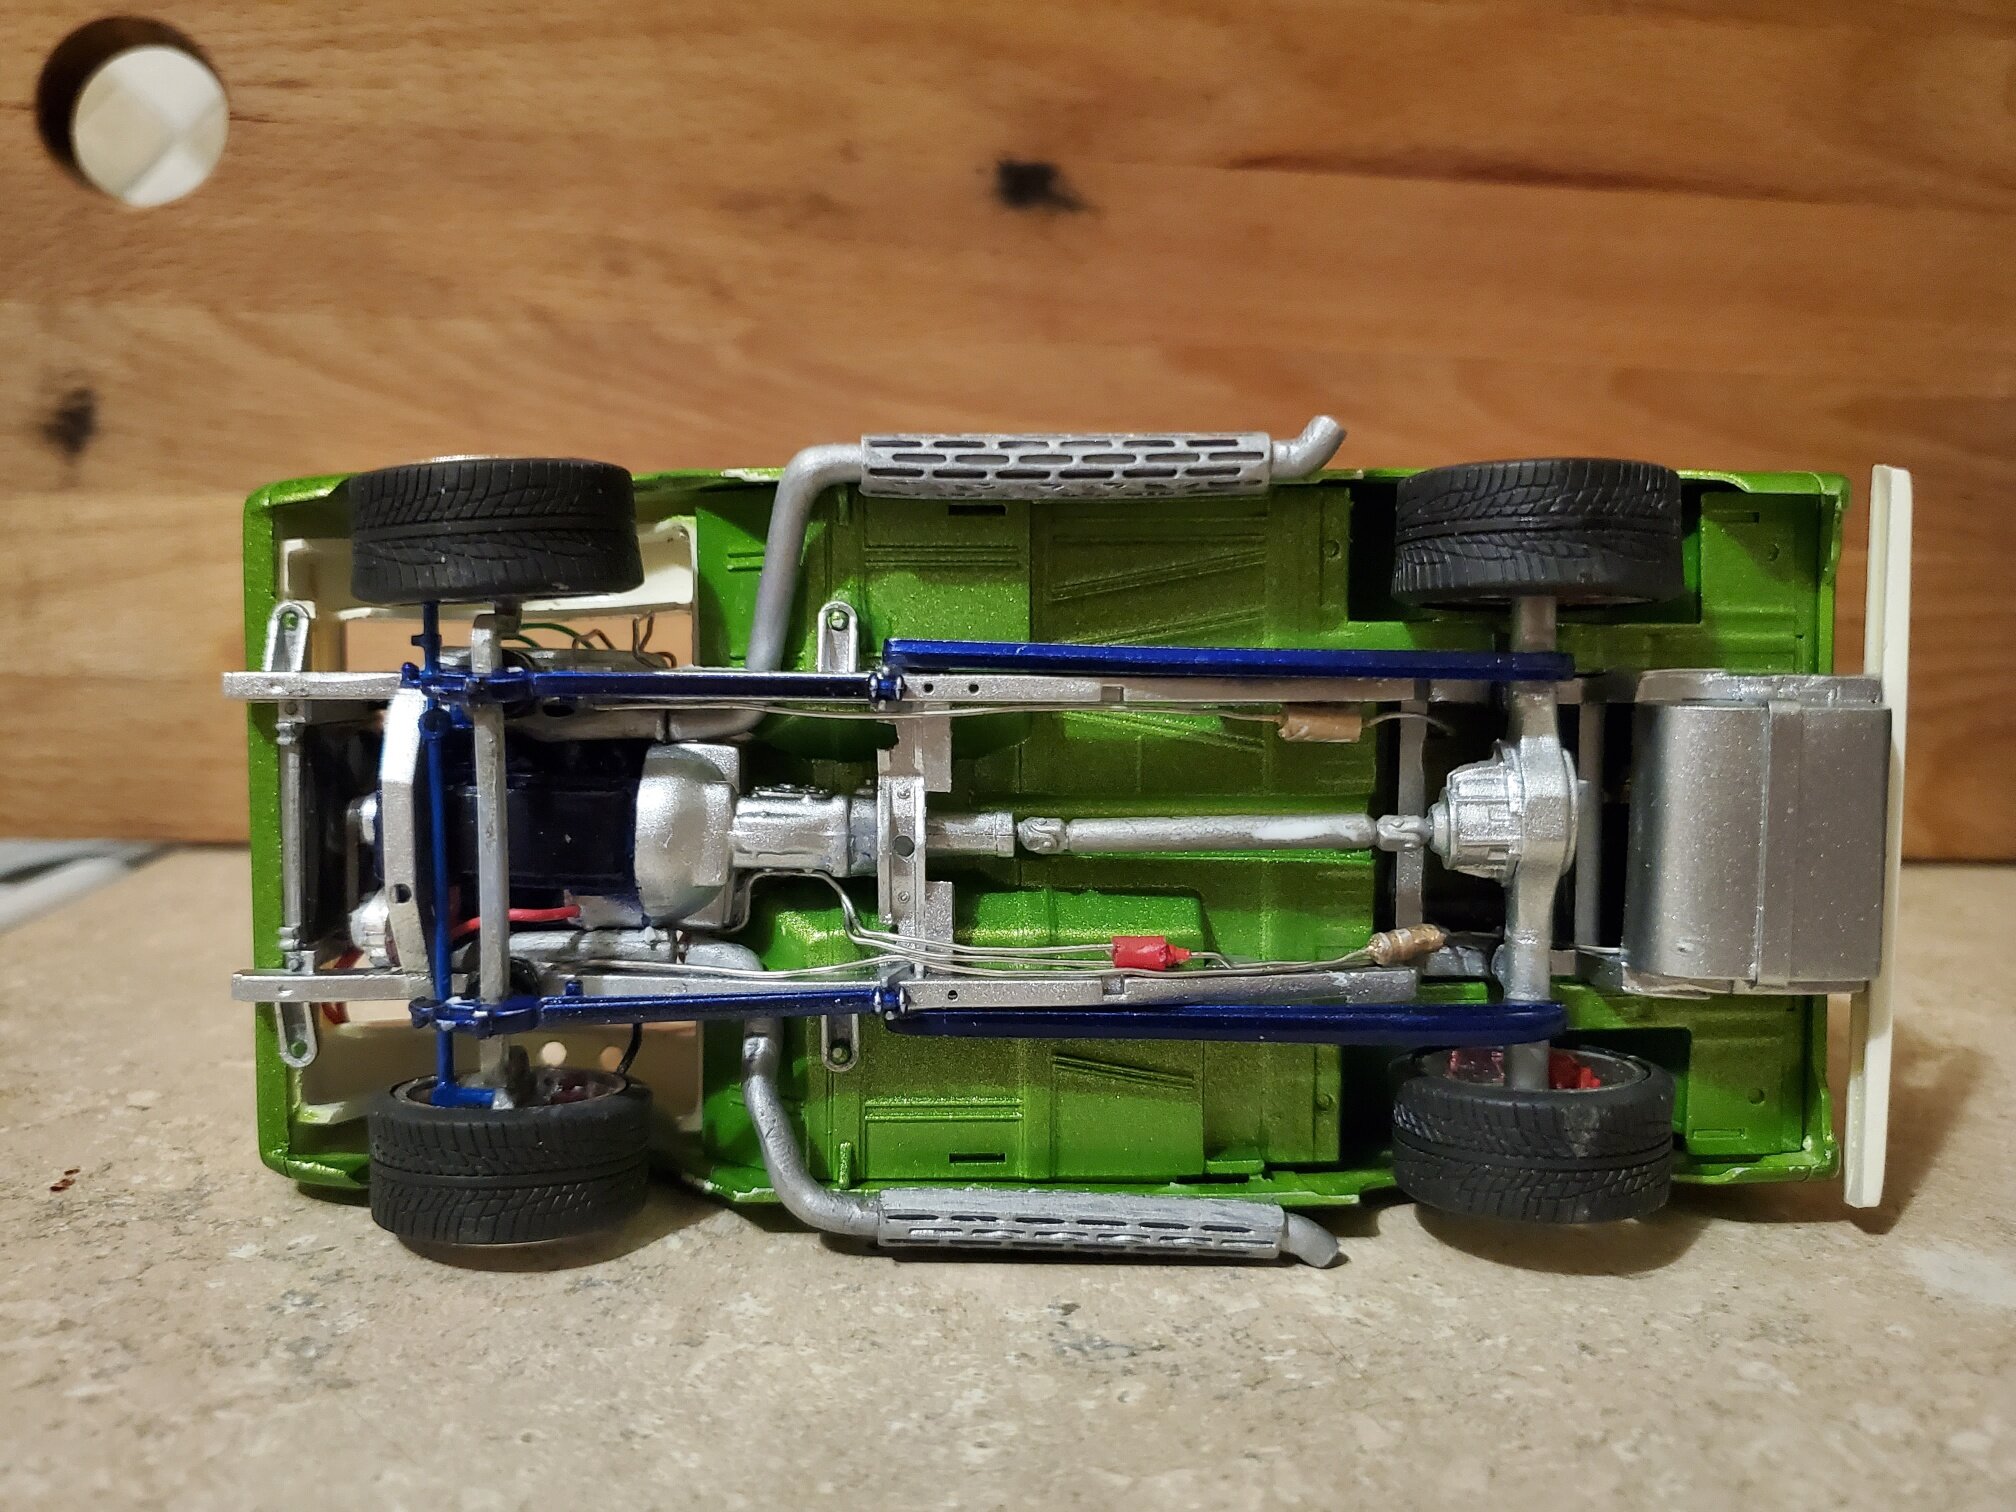
Notched frame and tubbed/channeled floor pan
Public Library to the rescue
Once I determined that I needed a shallow, dry-sump oil pan, I decided to have one 3D printed instead of scratch-building one. Since I had not yet bought a printer of my own, I discovered that the very cool Maker Lab at the Denver Public Library had 3D printers available for use. So I took my design and popped in for a visit. An hour or so later and, voila, my first 3D printed part! I was hooked from that point forward. I bought my first printer and started designing more 3D printed parts to complete this wild, custom build.

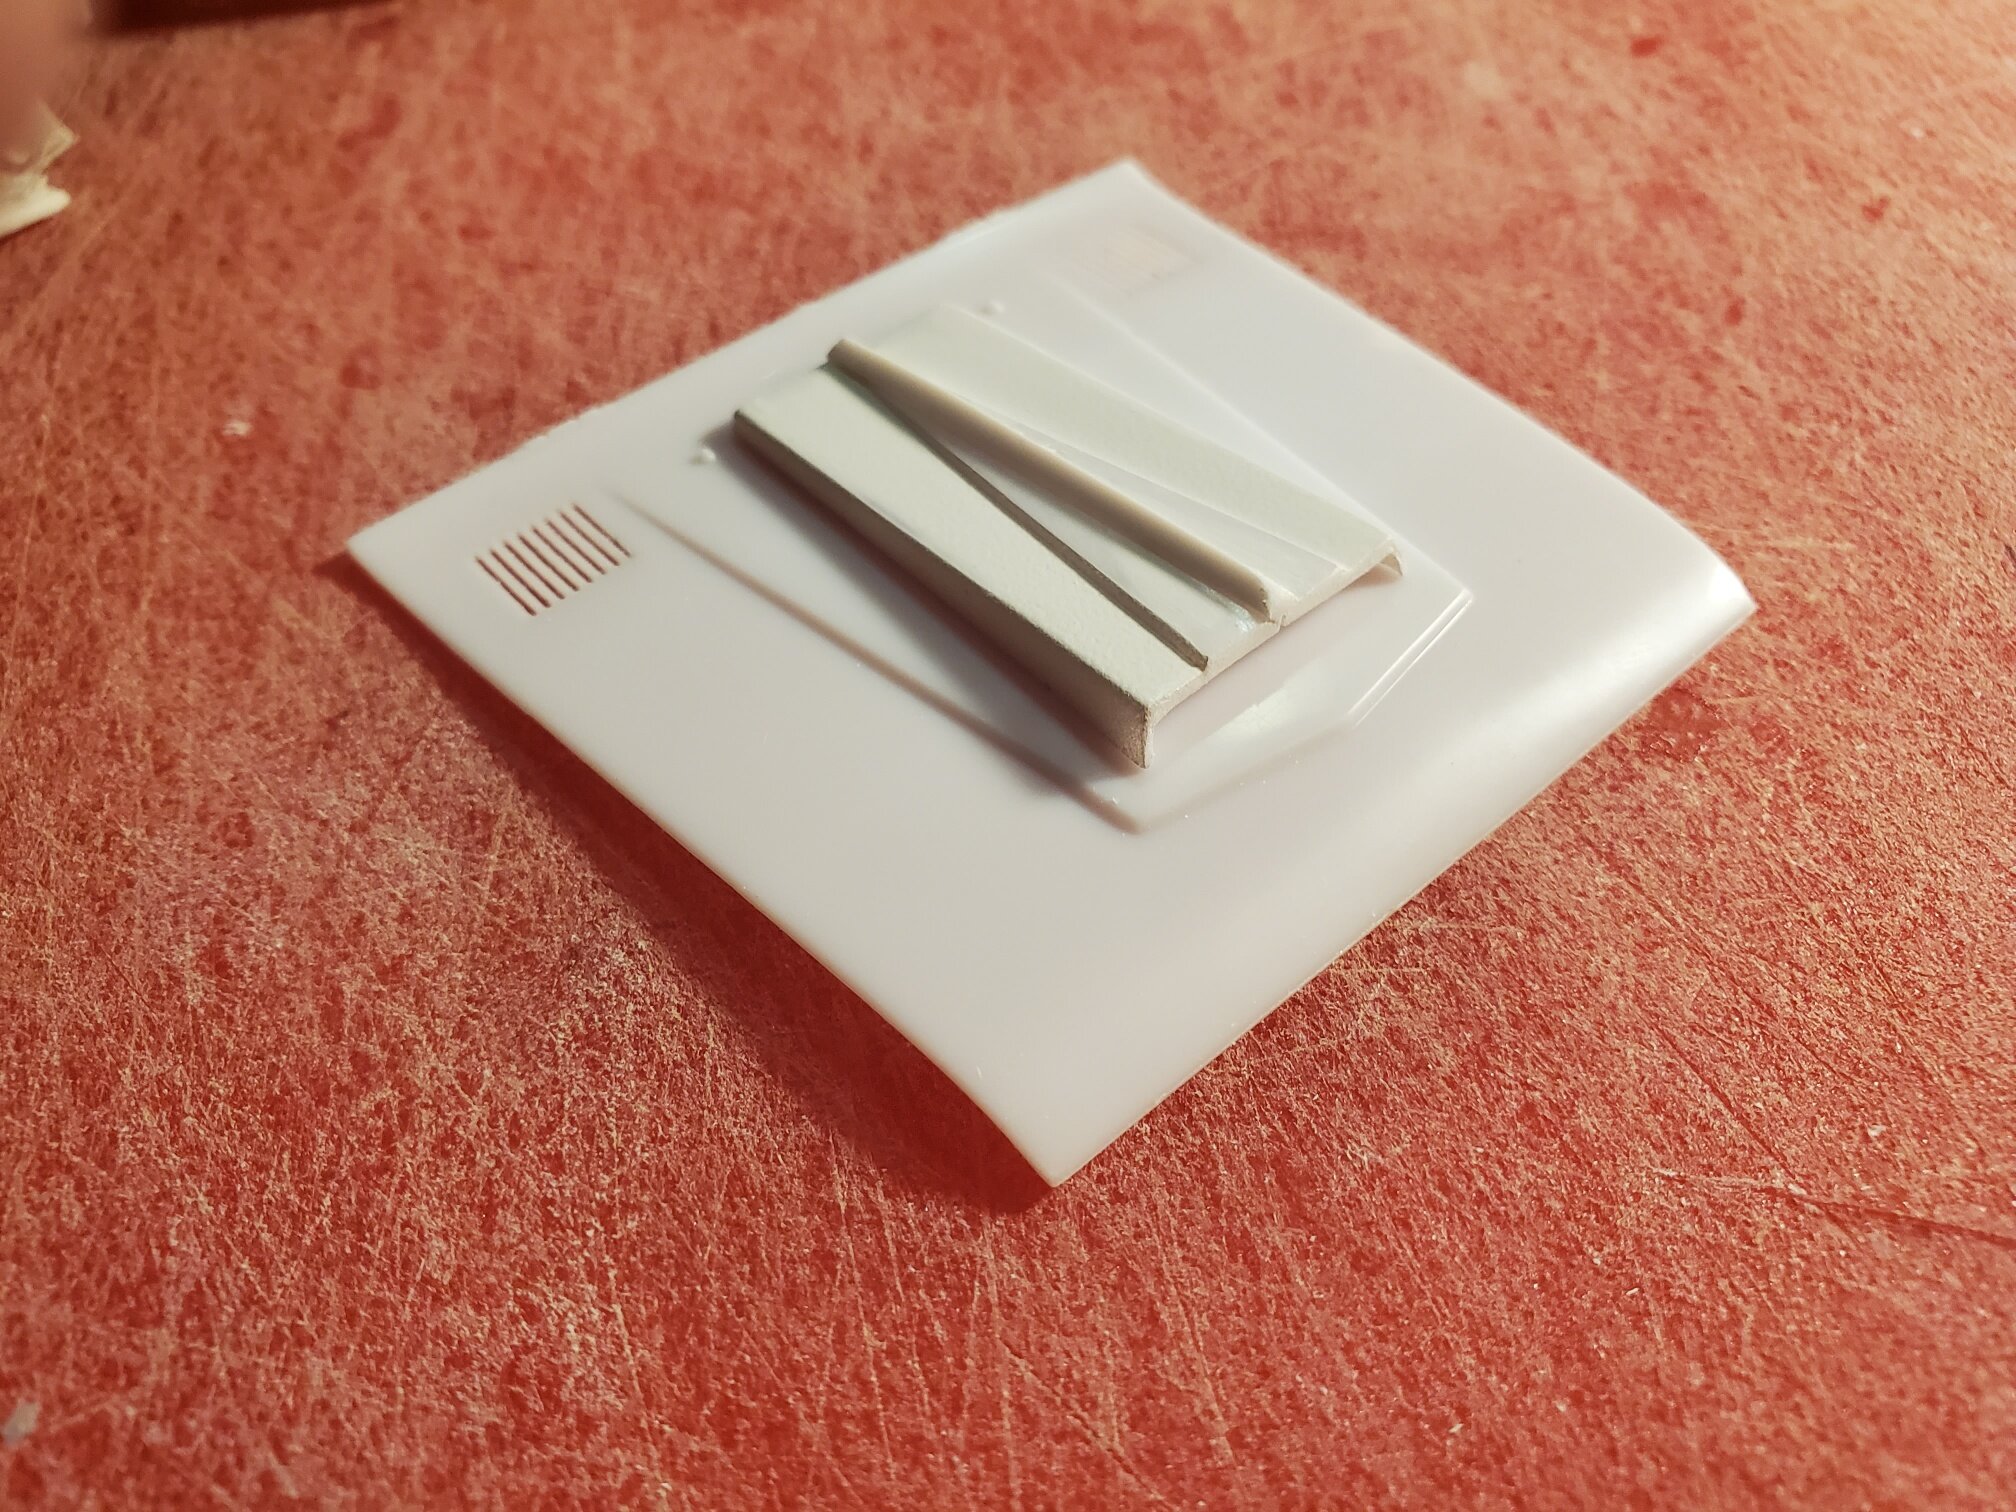
Ford FE Dry-Sump Oil Pan
My first model car part designed for 3D printing!
hot rod inspirations
In order to drop the Bronco a total of 9 scale inches, I designed a hot-rod style front drop axle as well as a Ford 9-inch axle, air suspension airbags and a bomb-style air tank complete with pressure gauge and regulator. Routing the exhaust under the body was going to be tricky with the low stance, so I decided instead to bend a pair of side pipes from styrene rod. I then designed and 3D printed the heat shields for the exhaust. To add some bling behind the big, open wheels, I designed and 3D printed a set of disc brakes for all 4 corners.

3D printed Bomb-style Air Tank with Regulator. Scratch-built air suspension plumbing, valve block and wiring.
in for a penny, in for a pound
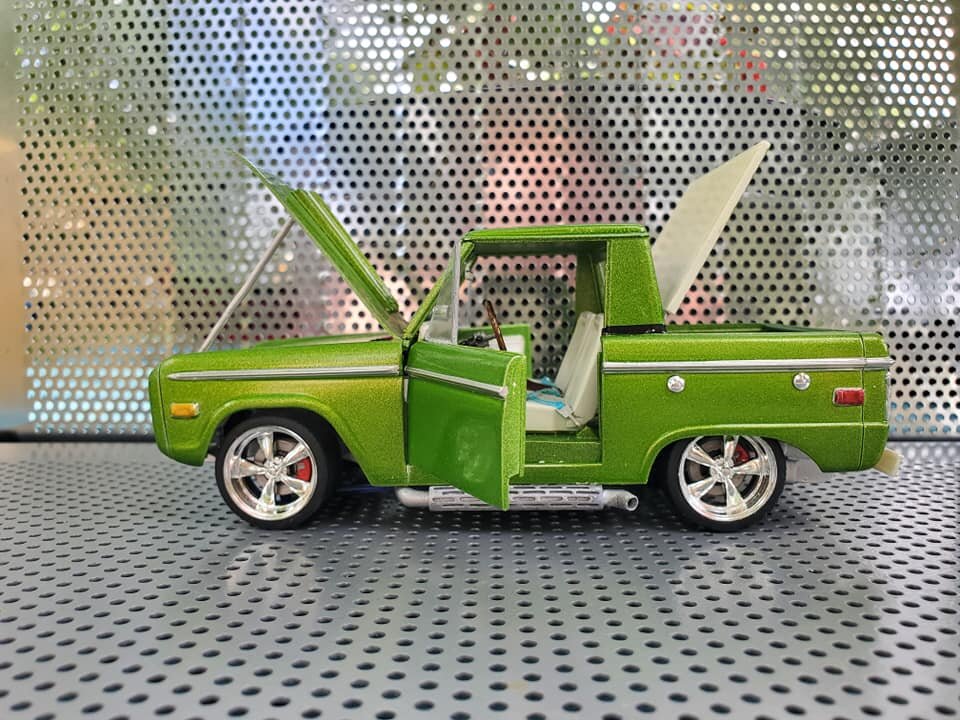
As this build progressed, there were times where it felt like taking one step forward and two steps back. At times I felt like just slapping the rest of it together, but ultimately I decided that if I had already put so much time into lowering the Bronco and modifying it to accept the 427 cammer motor, I owed it to myself to make the rest of the build just as detailed. Looking at the finished product, I’m glad I did. In the end, very few stock parts from the Revell Bronco kit ended up on this build - by my count, all but 10 parts were not modified in some way. In addition to the chassis and floor pan modifications, this was also my first time opening up the doors on a build. For the door hinges, I used thin nylon hinges made for RC aircraft. Even the Olson Brothers half-cab conversion kit received a little reworking - I chopped it about 2mm or 2 scale inches and raked the windshield to make the profile flow better. In addition, a handful of other kits donated parts to this build:
The 427 SOHC, gear shifter and rear suspension arms came from the AMT 1967 Mustang GT Fuel Injected Funny Car. That kit also gave up one of its chrome taillights which I gave a red wash and turned into the ignition control module under the hood.
The tonneau cover over the bed was modified from the MPC Datsun Pickup kit.
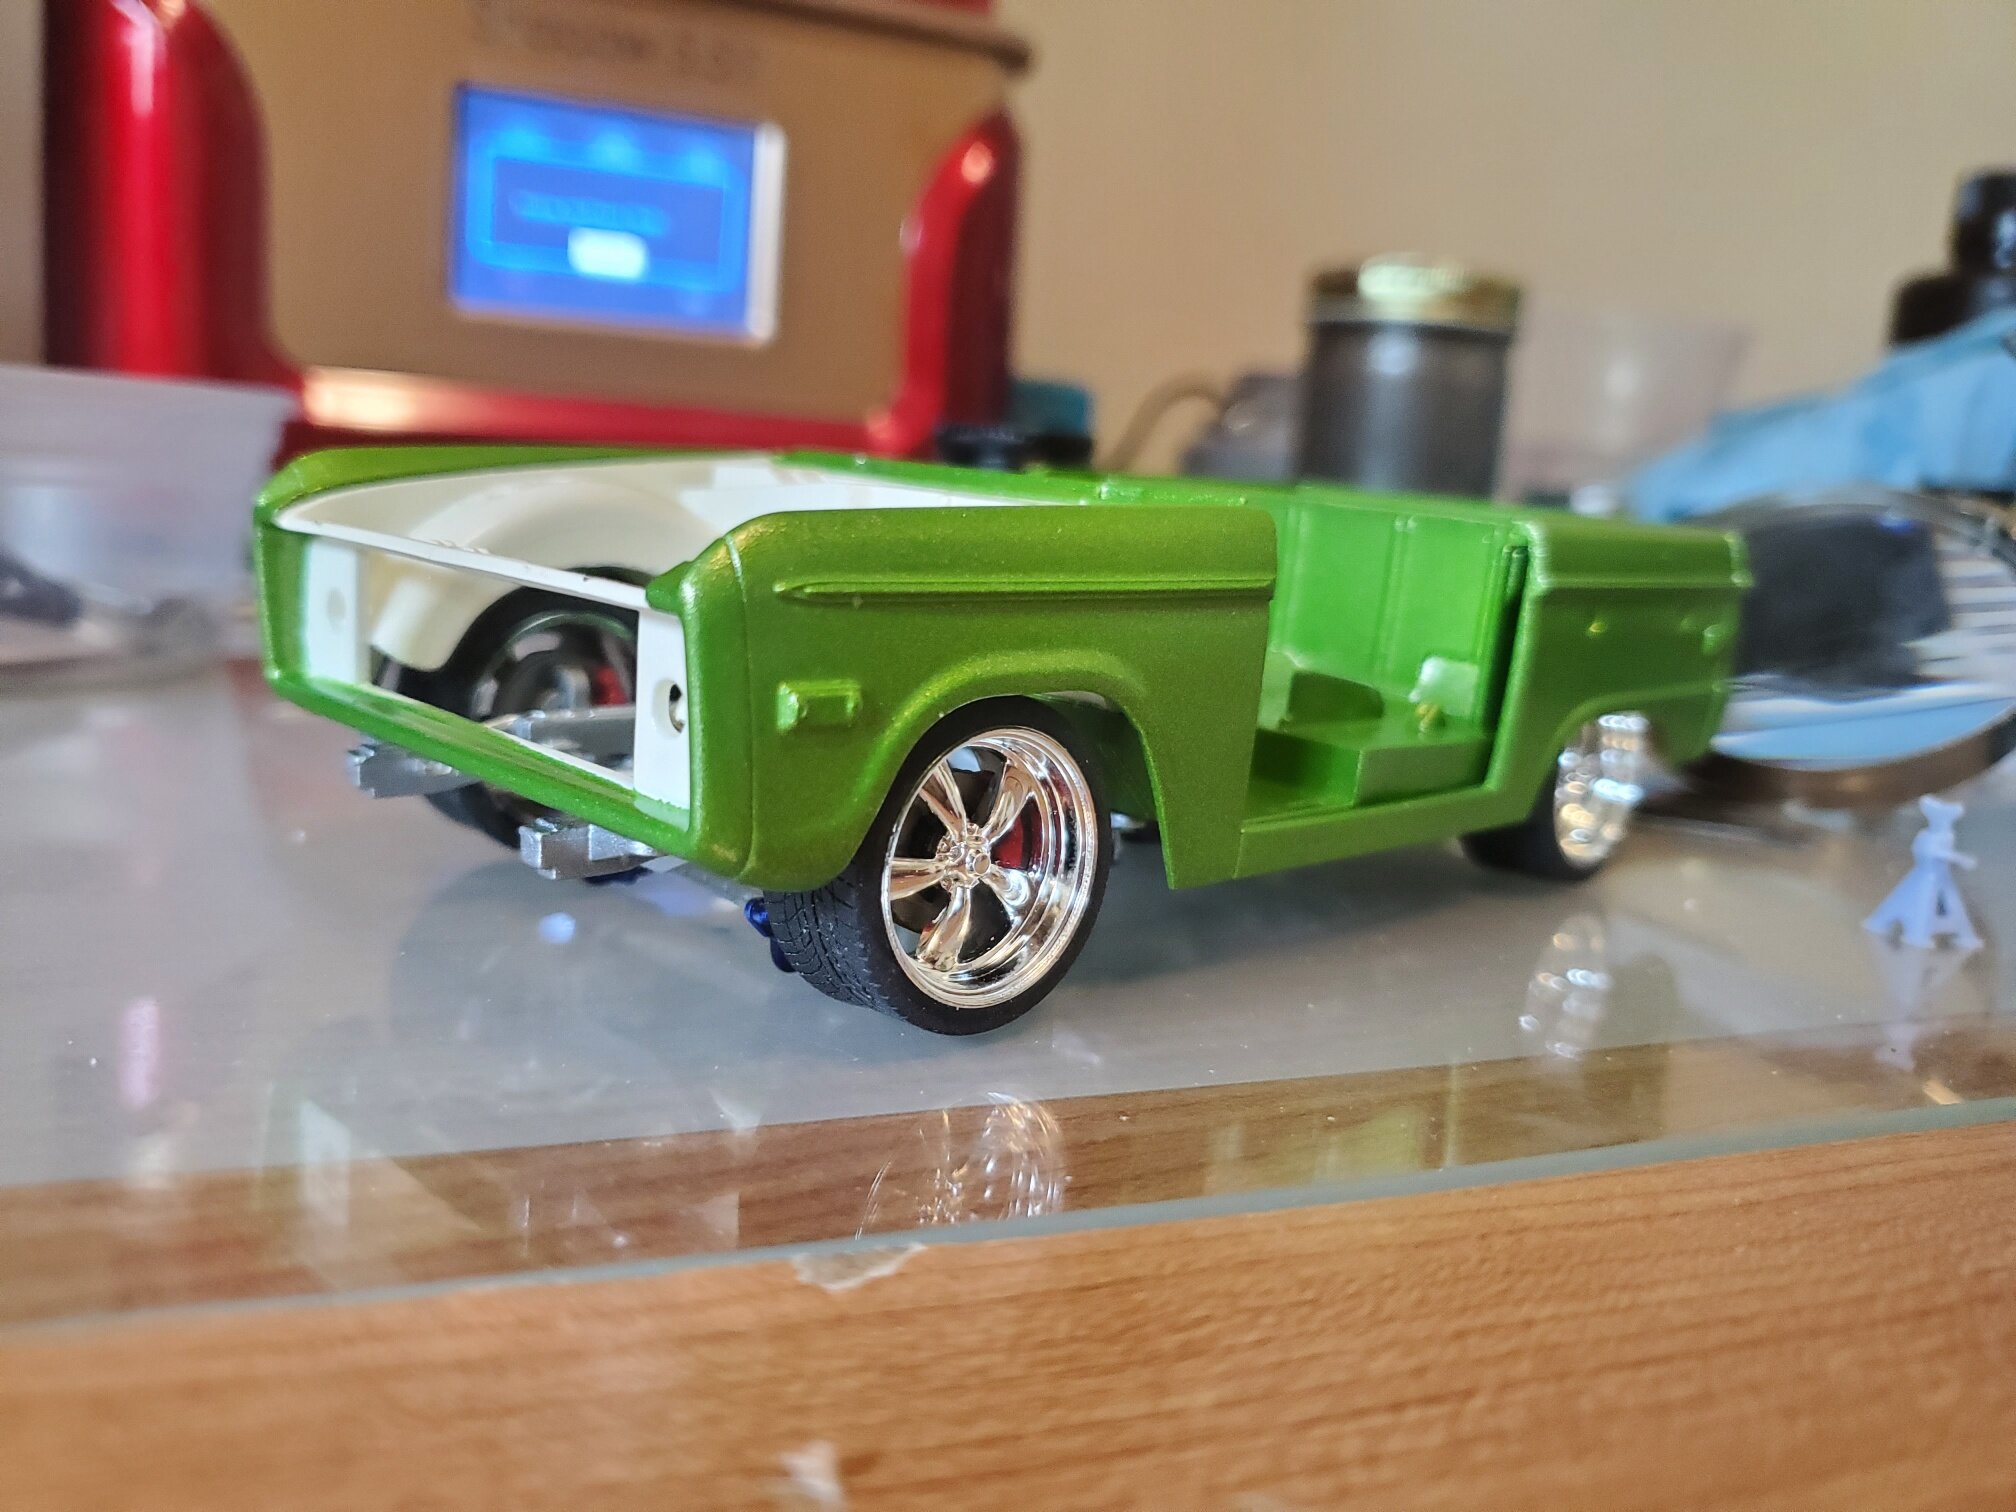
The hood scoop was made by narrowing the wide scoop from the Revell 1967 Plymouth GTX kit, and adding a strip of quarter-round styrene along the top of the scoop to hide the seam. Also from the GTX kit is the dashboard mounted tach and exhaust headers.

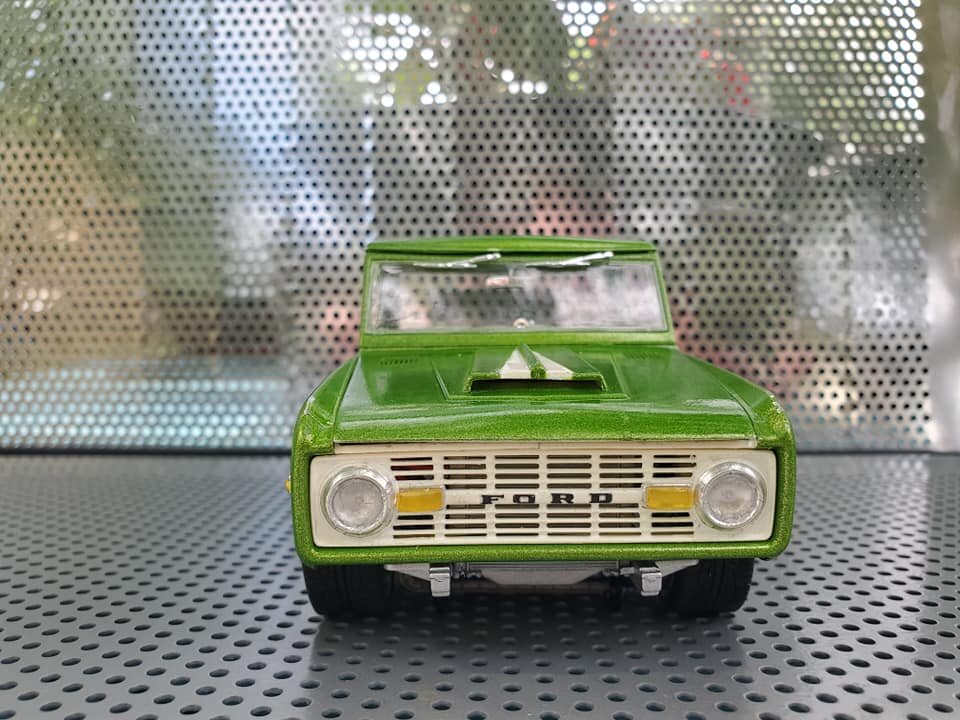
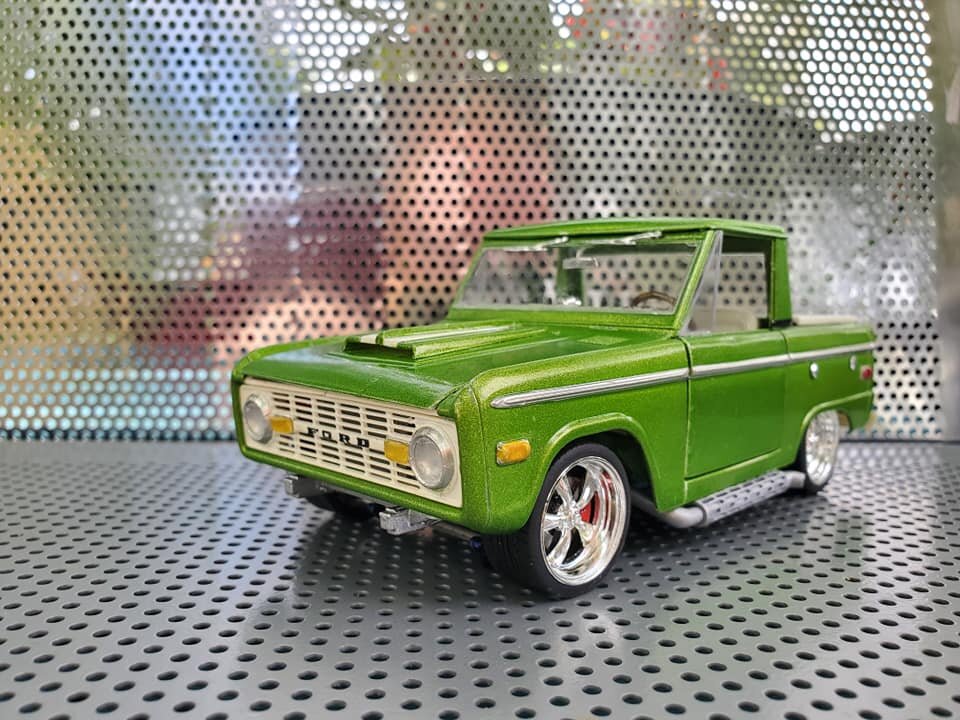
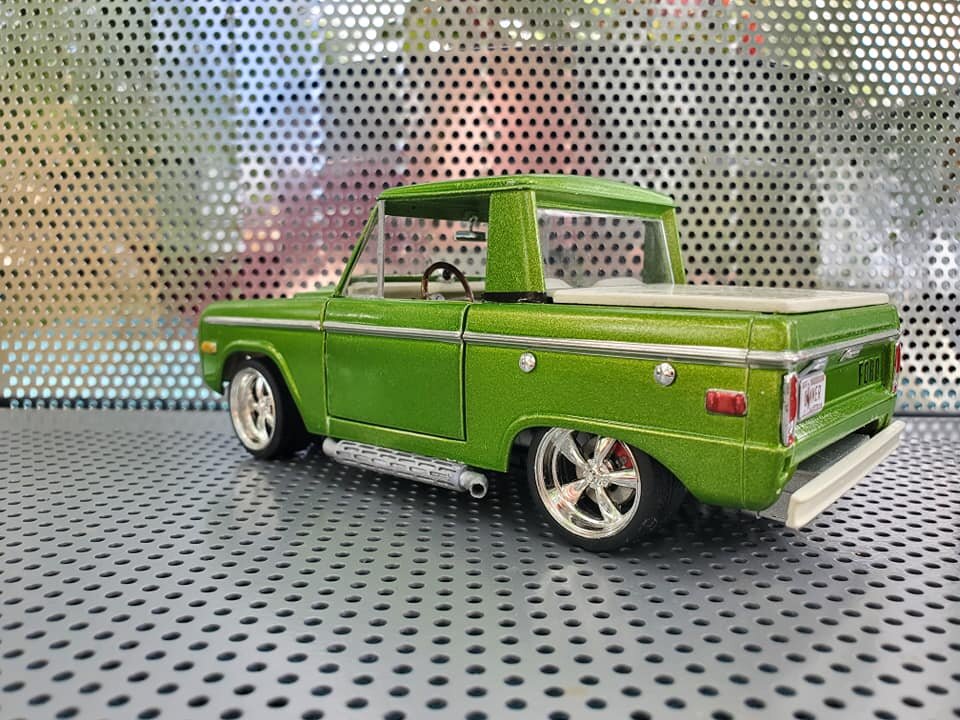
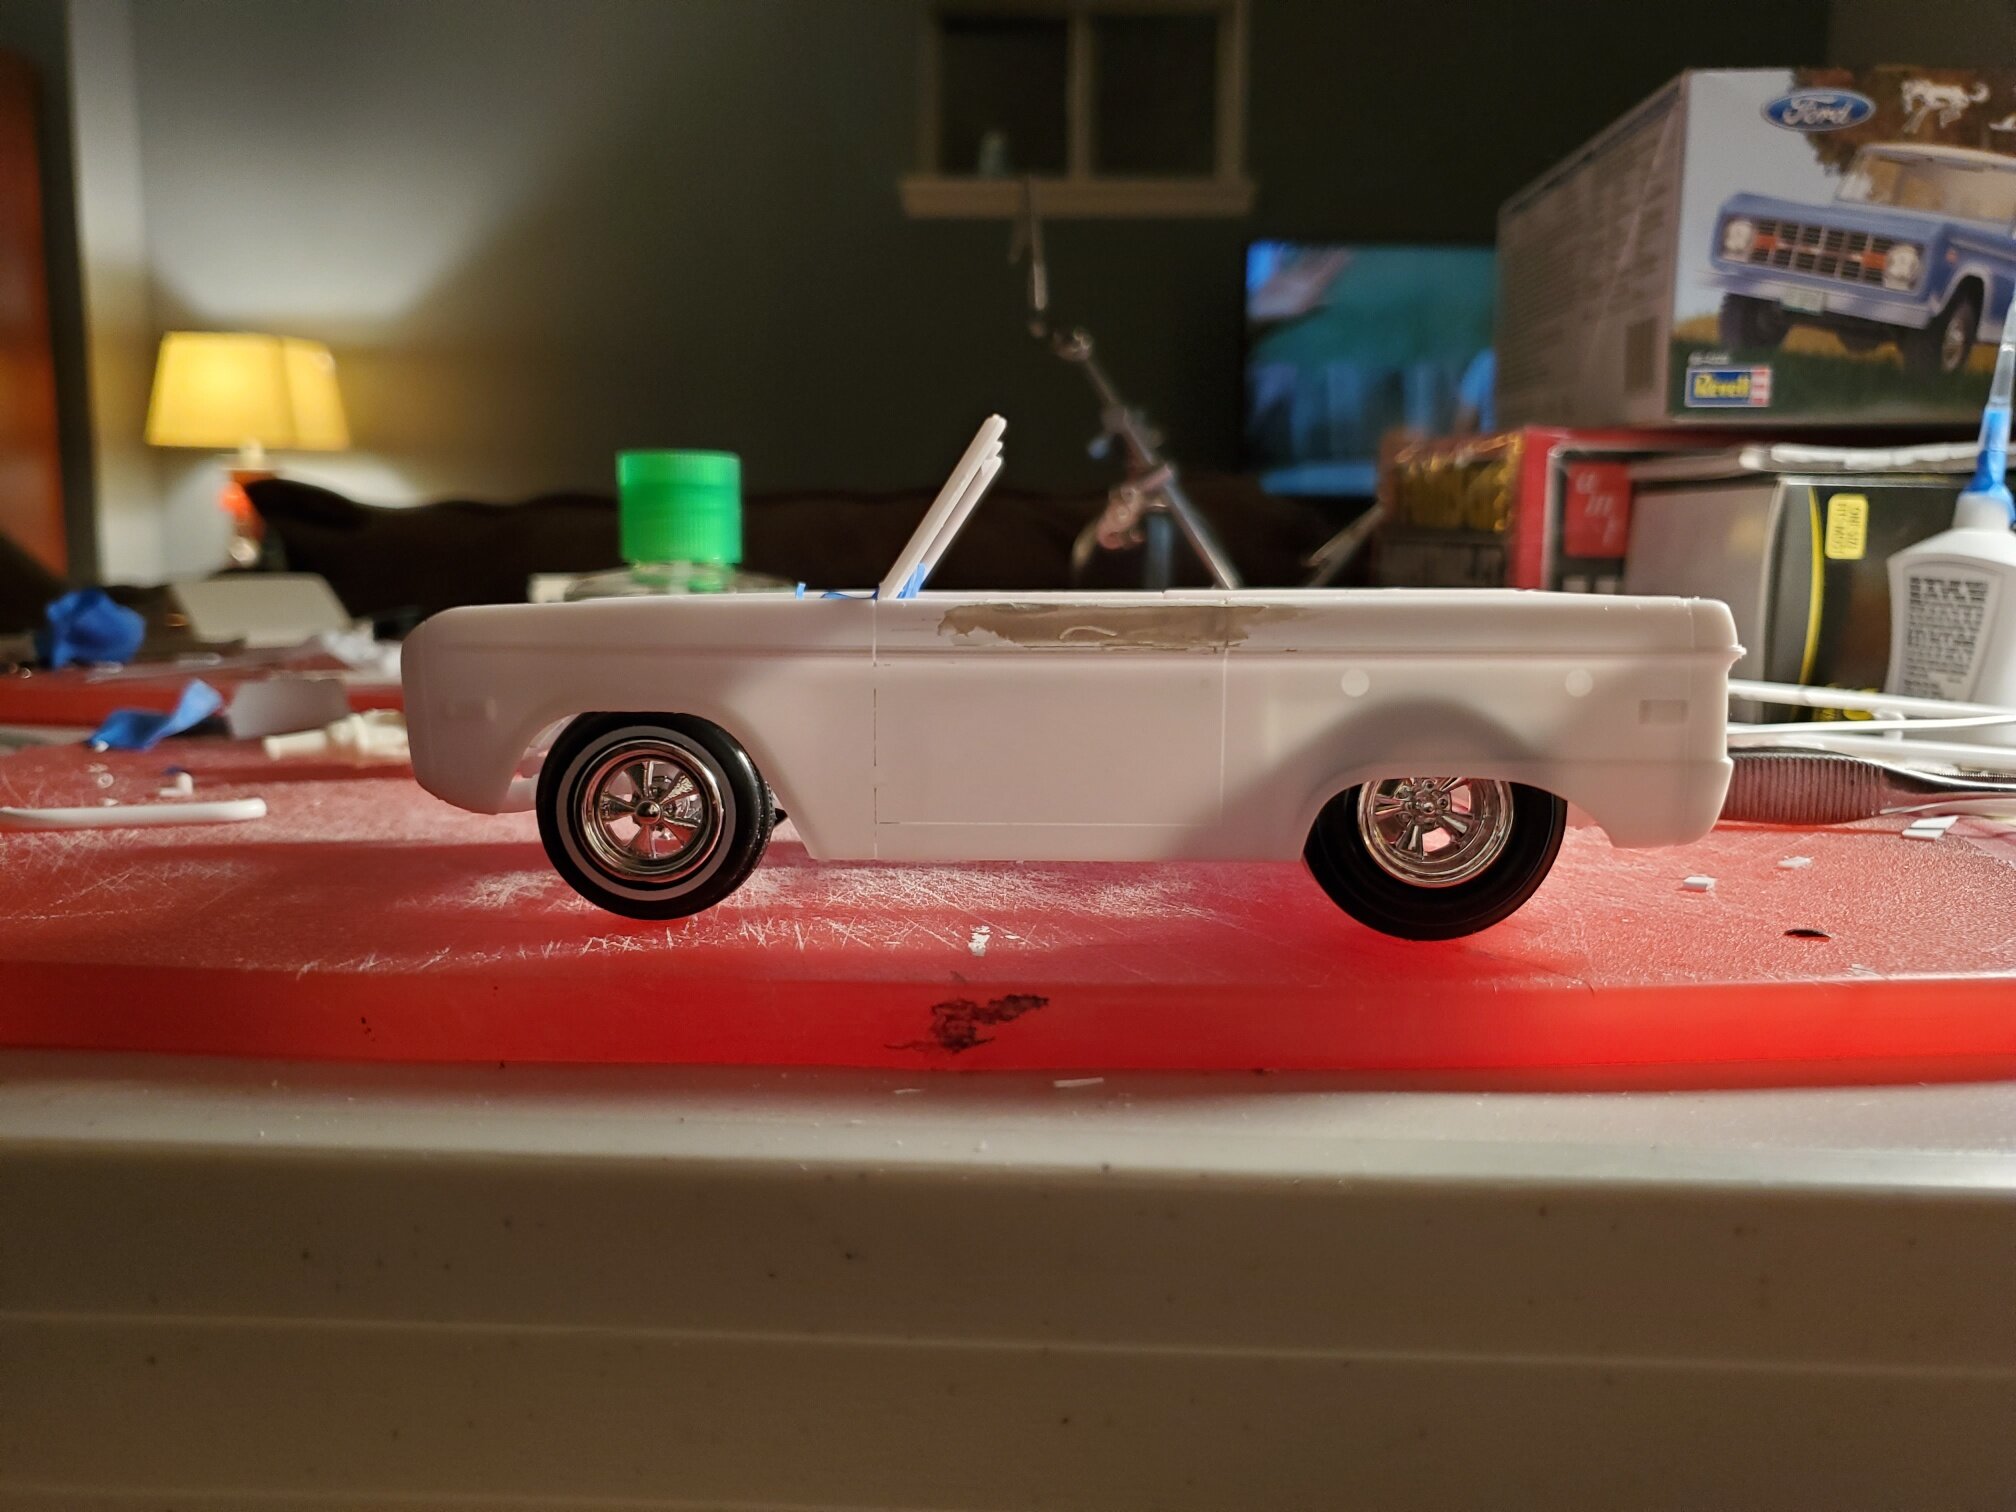
If you look closely under the truck, you can see the drop axle up front. This is also a good view of the hood scoop, modified from the Revell GTX kit. With this stance, I think the front view of the Bronco takes on a very Mustang-like look. But maybe that’s just because I know what’s under the hood!
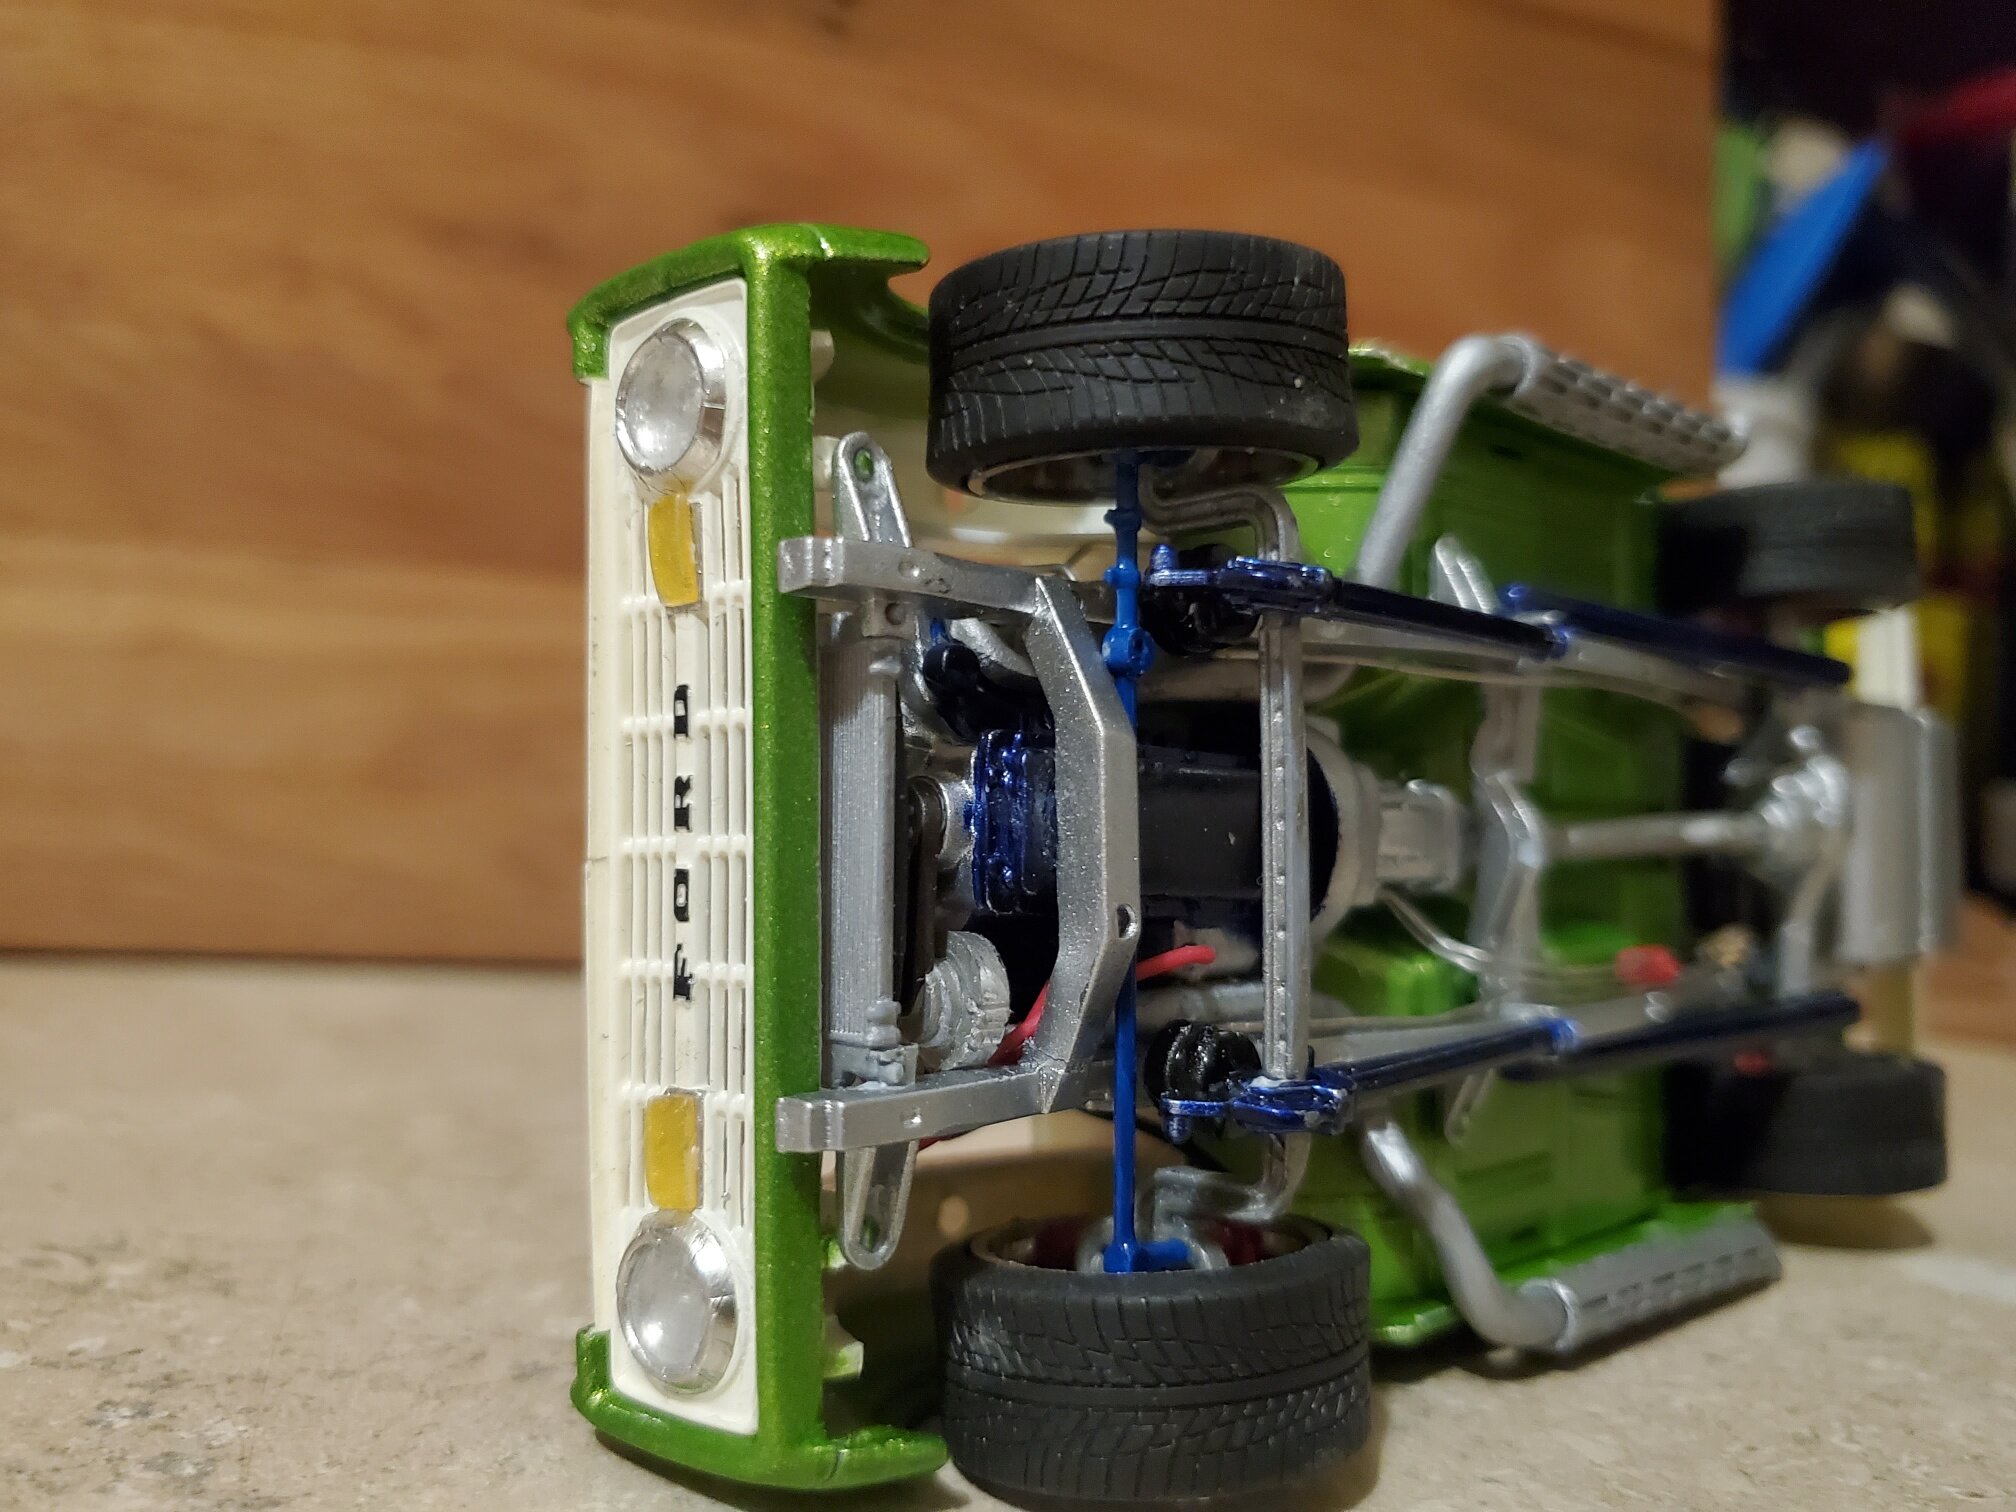
View of the 3D printed drop axle and air bags.
Here you can also see the dry sump oil pan that was made to fit this massive engine in the lowered Bronco.
Scratch-built parts and other detailing include:
Air suspension plumbing, wiring and valve block
Front and rear wheel tubs. Rear tubs were scratch-made from sheet styrene, front tubs were cut out of a spray paint cap.
Rear frame notch - I completed this part of the build before I began 3D printing.
Side exit exhaust pipes bent out of styrene rod, ends drilled and finished with 3D-printed heat shields.
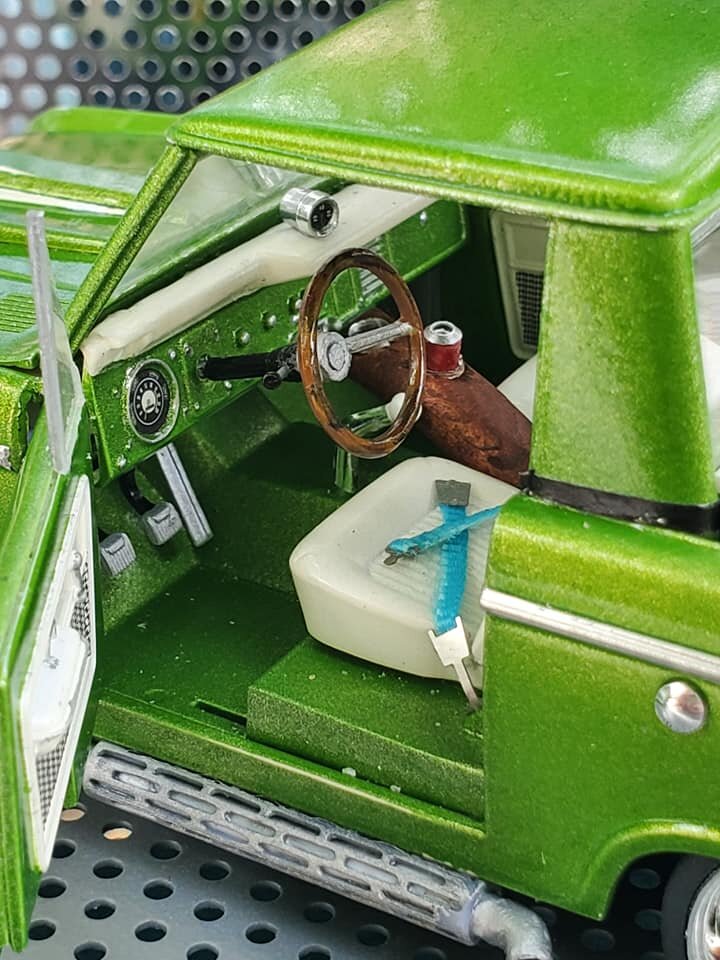
Hand-carved, sculptural wood center console, complete with aluminum cup holders and soda can.
Flared aluminum tube for the fuel injection velocity stacks, styrene and aluminum fuel rails.

Interior details. A lot of scratch-building. And dust. (I shot these photos outside.)
The 3D-Printed Parts from Bolide Plastic Motorworks used on this build, and available soon in our store, are:
Ford 9-Inch Rear End
Air Shocks
Bomb-style Air Tank with Regulator
Two-Piston Disc Brakes
Exhaust Heat Shields
9” Hot Rod-Style Drop Axle
Ford FE Dry-Sump Oil Pan
Build Details:
Builder: Chris Bell
Kit: Revell Bronco, 1/25 Scale
Wheels/Tires: Pegasus Hobbies 17” “T’s”
Paint and Finishes:
Body: Tamiya Racing White Lacquer, Testors Lime Ice Extreme Lacquer over Tamiya Racing White base, Model Master Clear Gloss Laquer
Chassis: Testors Diamond Dust Extreme Lacquer
Engine Block, Suspension Details: Tamiya Deep Metallic Blue over Testors Diamond Dust Extreme Lacquer base
Varathane Premium Wood Stain - Cognac applied to center console, Chrome Bare Metal Foil, various Testors and Model Masters enamel paints.
Build Hours: Oof. I don’t even know. Well over 150.
Thanks for reading! want to use any of the 3d printed parts on your own builds? they are all available in the store. Also, as this is the first build article on this site, I want to know your thoughts? did you enjoy reading about this build? was it too much detail? not enough? let me know in the comments below what kind of content you’d like to see!